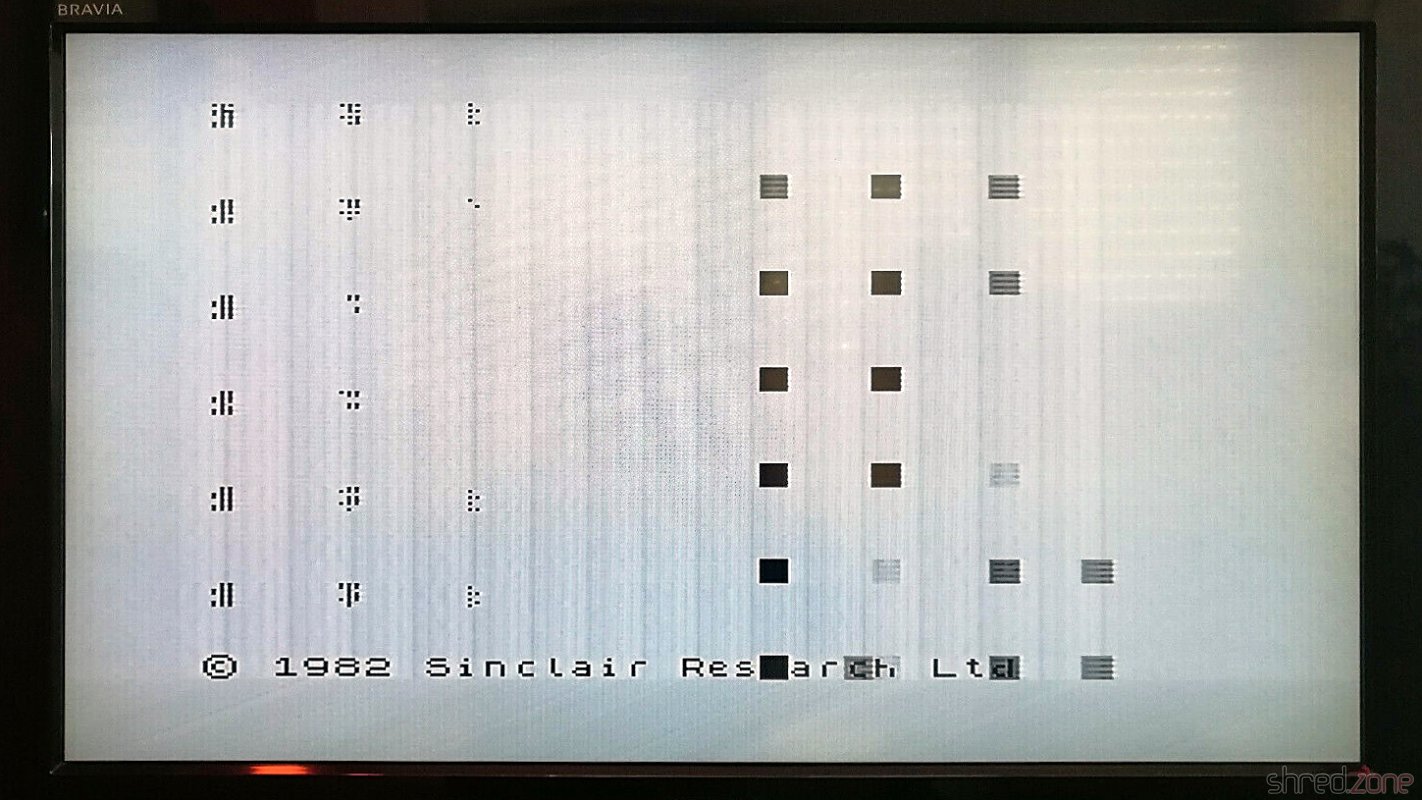
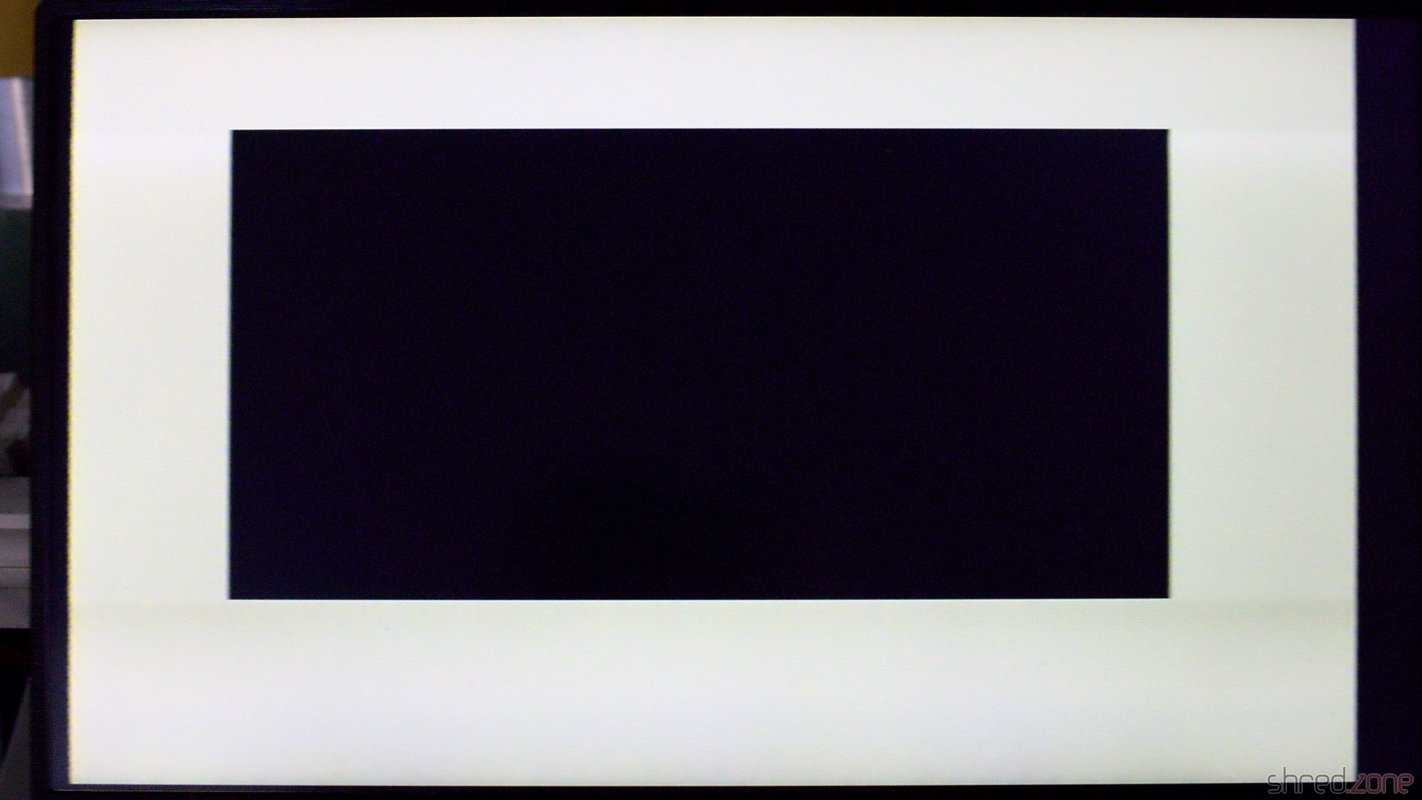
When I started to refurbish old computers in 2021, I couldn't imagine that it was so much fun. 😁 The other day I bought another ZX Spectrum. According to the seller, it had some strange artefacts on the screen and also stability issues, so it was sold as defective. When I tried it at home, it was even worse. I just got a black screen on a white border.
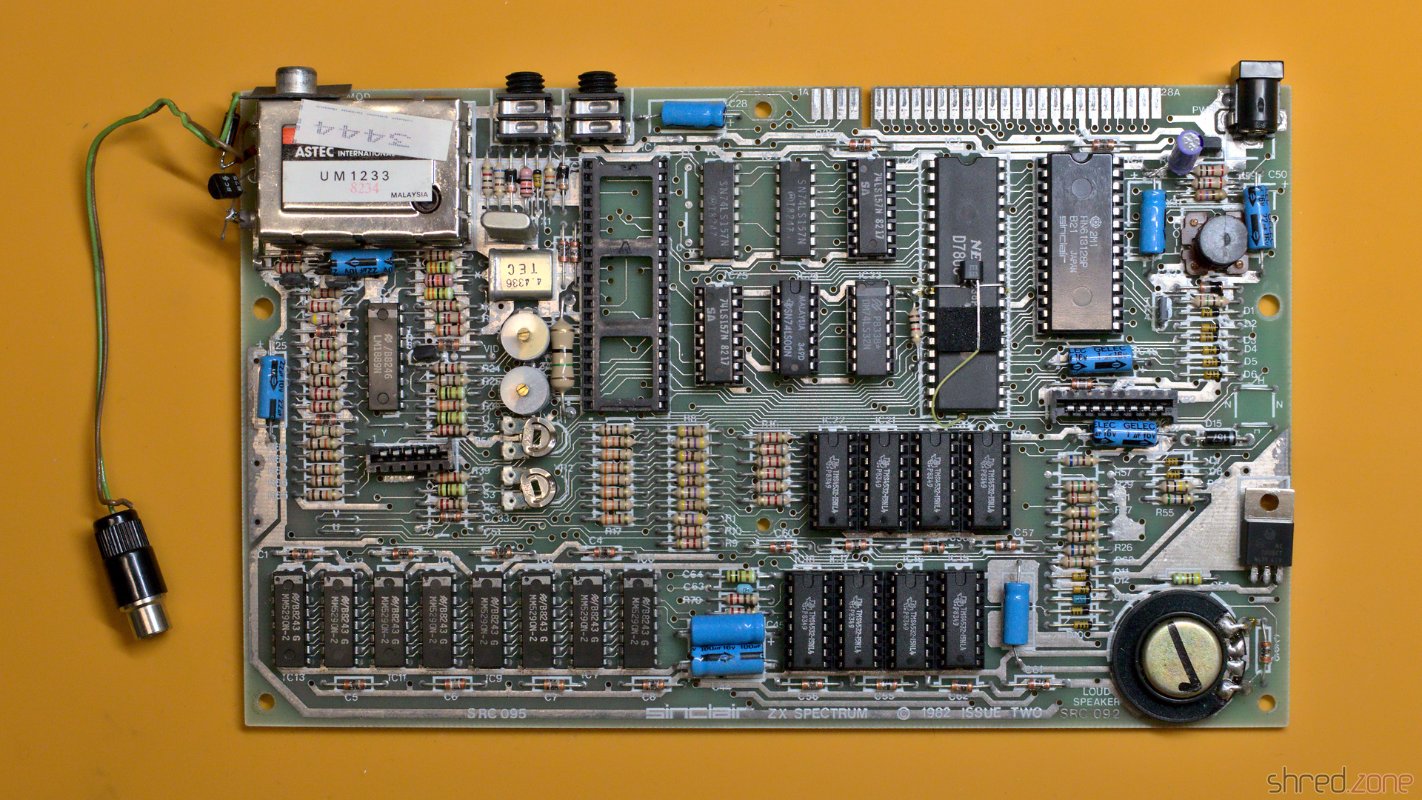
Inside the case I found an Issue 2 board. The previous owner has added a composite output on a separate connector. As the age of TVs with tuners is definitely over, there is no need to keep the modulator output. I will do my own composite mod instead, and remove this ugly cable that was hanging out.
The manufacturing dates of the components tell an interesting story. This computer has probably been manufactured around the end of 1982. However, all chips that are related to the upper 32KB RAM are socketed, and some were made in 1983. I guess it was originally built as 16K model, and has been extended to the full 48K a year later. As the only chip on this computer, the ULA was made in 1984, so maybe it had been replaced around then.
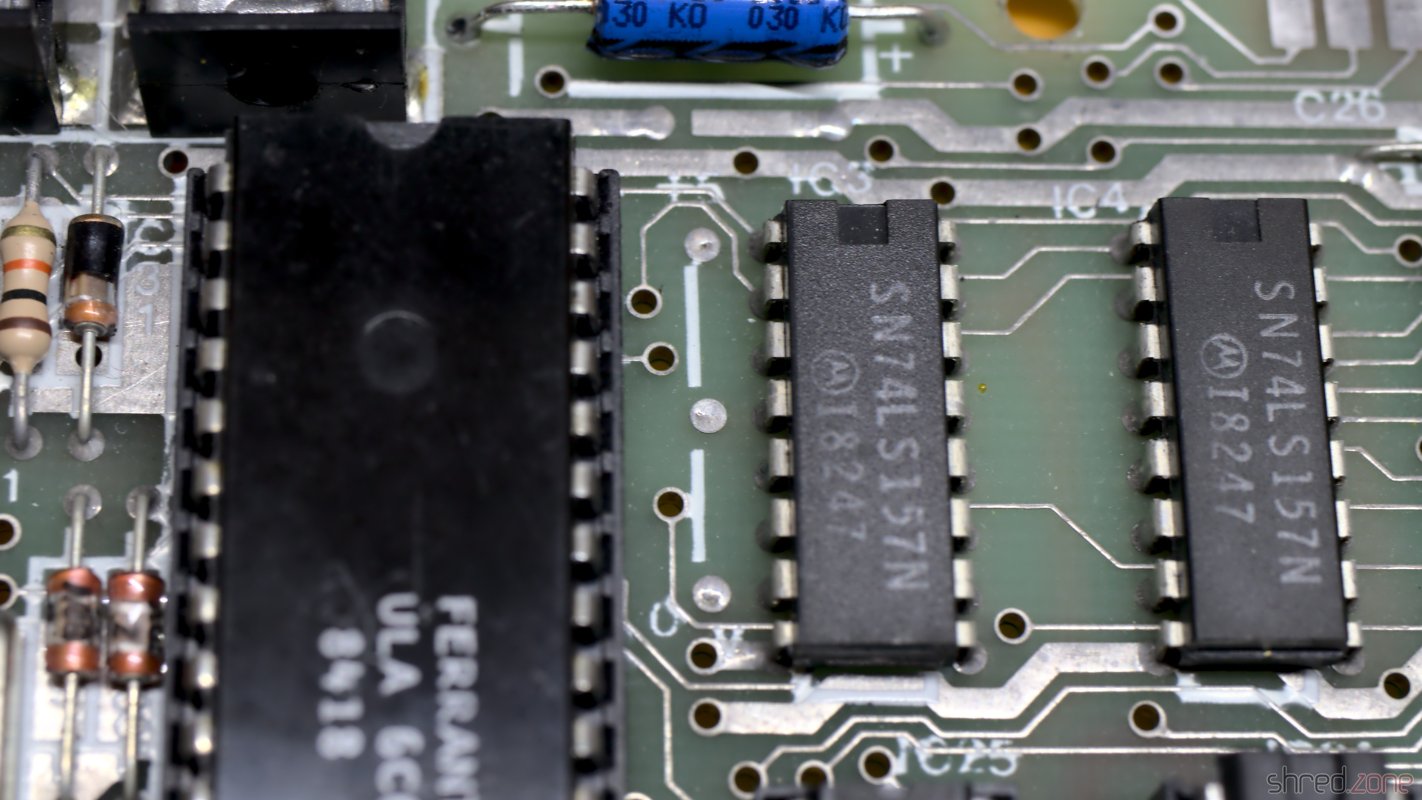
My main suspicion was that the ULA was broken, so I put it into one of my working Spectrums, and was happy to find it in working order. The problem must be somewhere else.
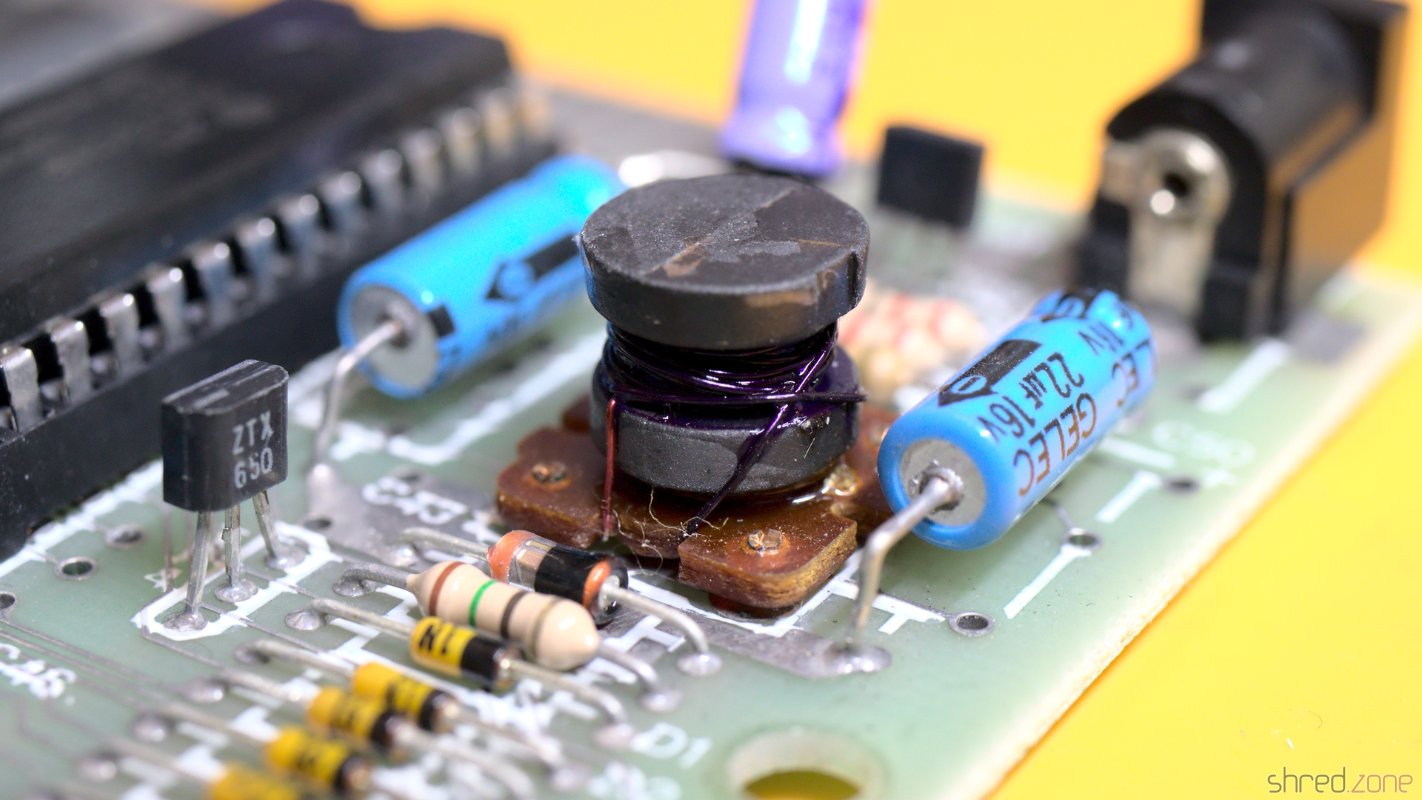
The usual first step is to check the voltages. And bingo, the 12V line had around 7V, and the -5V line was flat. This sounded very familiar, and a look at the coil confirmed my suspicion. The coil had a purple color, and a short between the primary and secondary winding. I guess the coil was already pre-damaged when the Spectrum was sold, causing the artifacts because of poor voltages on the lower RAM chips. When I powered up the computer at home, I eventually killed it.
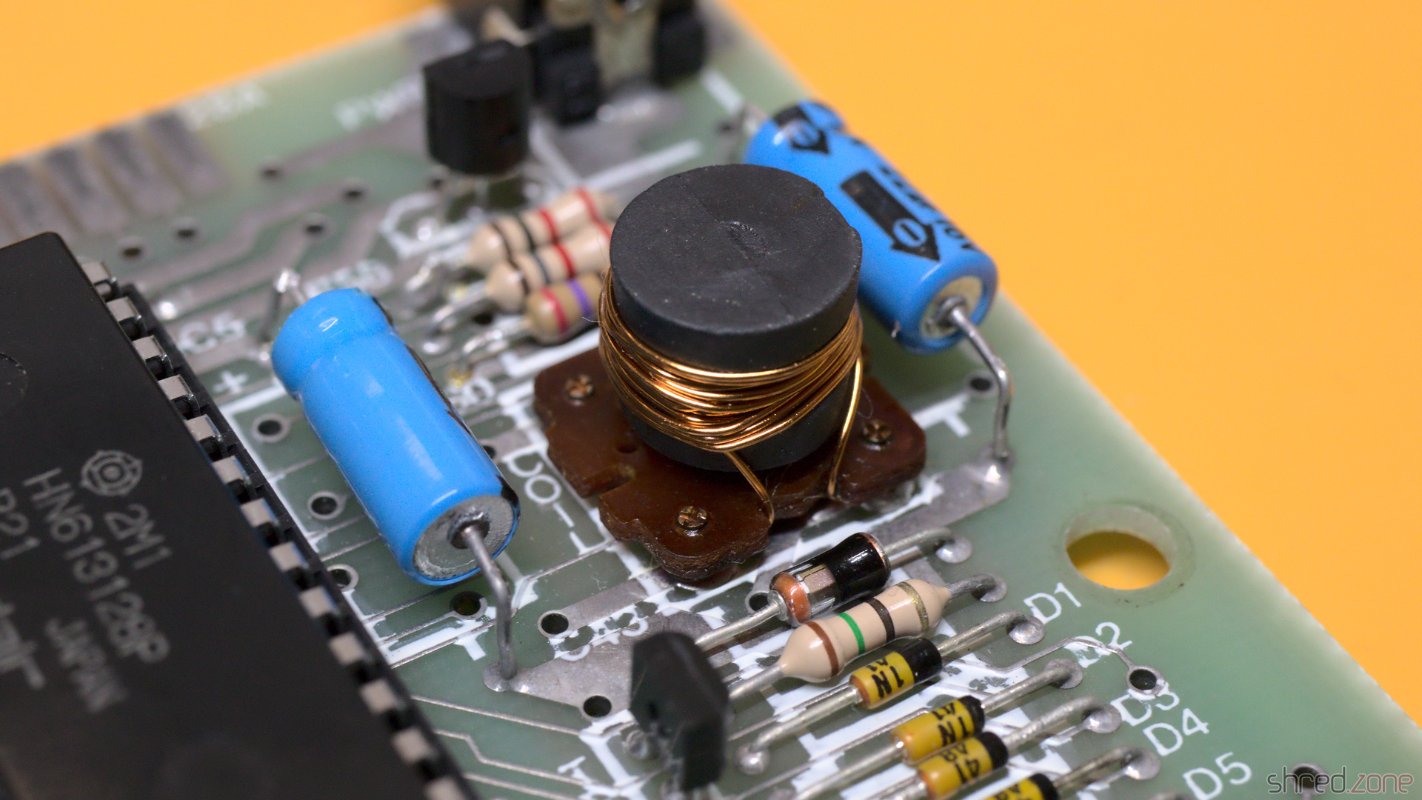
Well, it's not the first time I had to deal with a broken coil. I unsoldered it, rewound it, and replaced the semiconductors that usually get grilled as a result. Then I powered the system again, and found that all voltages were back to normal. Success!
I put the ULA back into its socket, so I could check what else is broken. And (to my displeasure, to be honest) the computer just came up and was working again.

What a spoilsport! I was hoping to have some more repair fun with that machine. 😉
Okay, what next? I started with replacing the electrolytic capacitors with fresh ones. Then I found something strange: A wire link was missing that was supposed to be there.
That link is important. The upper 32K RAM chips are actually 64K RAM chips, where one half of the memory turned out to be faulty after production, so they were sold with half the size for cheaper. The link configures which half of the memory is to be used. There is no pull-up resistor, so keeping it open is not a valid option. It might cause the upper RAM to randomly flip between the working and faulty memory half. I doubt that this computer has ever been working stable after it was modified to 48K. This link has just been forgotten by whoever did the modification.
The RAM chips are TMS4532-20NL4. The trailing 4 indicates that the upper part of the memory is to be used, so I added a link between the center hole and the "+5V" hole. A trailing 3 would require a link between the center hole and "0V".
I soldered in the link and replaced all electrolytic caps with Vishay ones. I also replaced the 7805 voltage regulator with a Traco Power TSR 1-2450. This modern DC/DC converter is a drop-in replacement that needs no heatsink, and is small enough to still fit into a classic ZX Spectrum case.

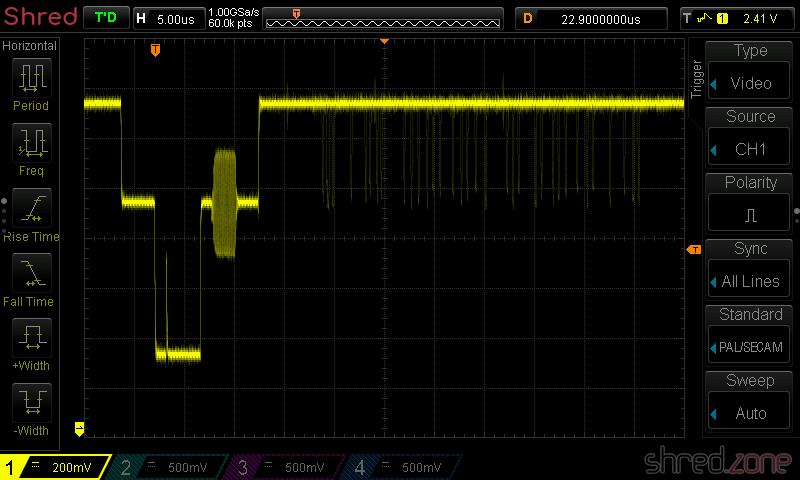
Issue 2 Spectrum boards have two variable resistors, VR1 and VR2, for color calibration. With the aid of an oscilloscope, calibration is a matter of a minute. I connected the scope to the composite video output (or to the video input of the modulator), and then adjusted both resistors until the signal was looking as smooth as possible. There is a blog article at Spectrum for Everyone that gives more details about the calibration.
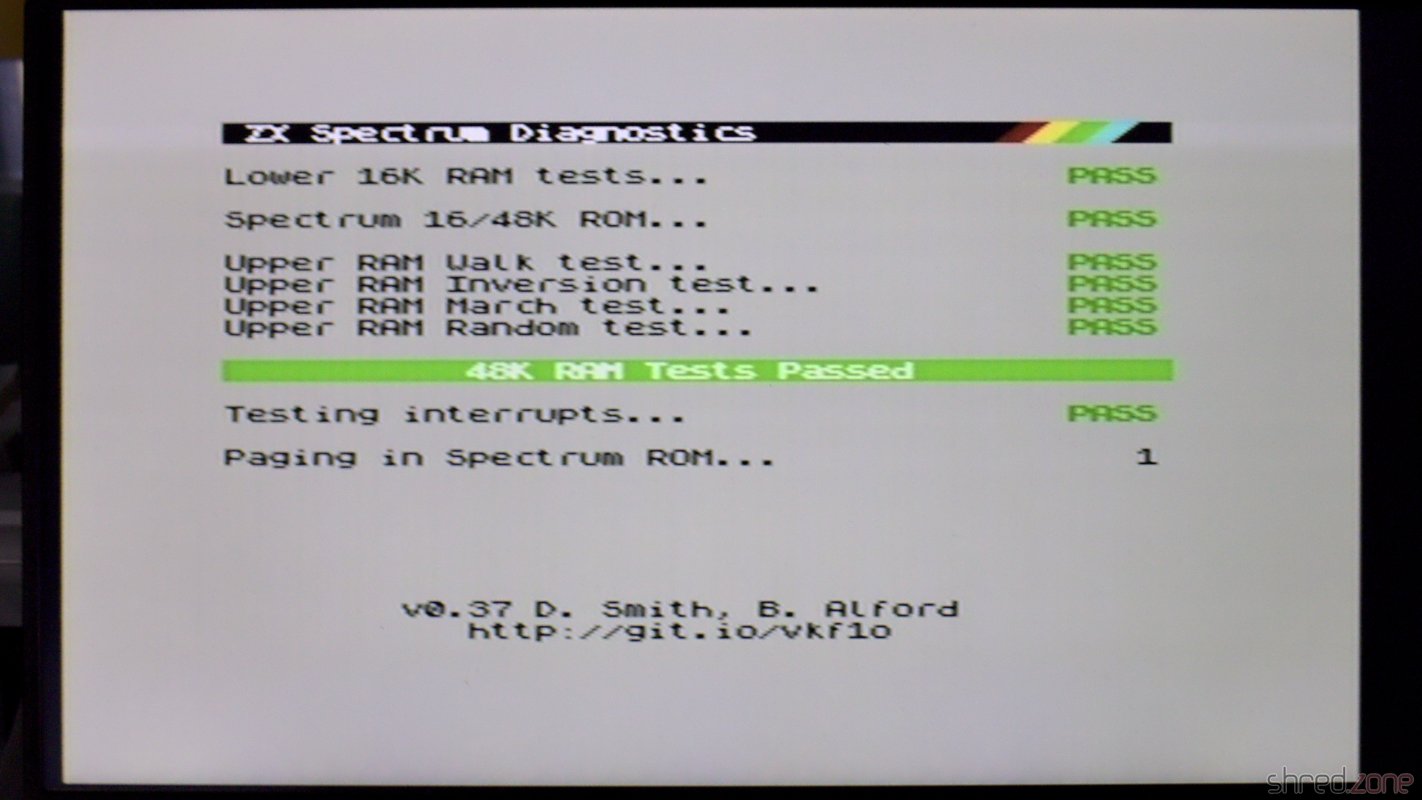
Finally, I ran the ZX Spectrum Diagnostics tool. All tests passed, even those of the upper RAM.
Another repair job well done. 😄
So there is my 3rd ZX Spectrum. Above all, I like the exceptionally good condition of the case. It seems that the computer has barely been used in its 40 years. The keys and faceplate actually look pristine, and there are also only very few and small scratchmarks.