 Sometimes you cannot choose your project, but the project chooses you. This one is about sending the status of a Home Connect clothes washer to MQTT using LoRa radio communication.
The project can be found at GitHub.
The Problem
It all started when my clothes washer broke down. I replaced it with a new one, one that is also IoT capable by using the Home Connect network. I liked the idea because the machine is located in a shared laundry room at the basement of the building. If I knew about the progress and the remaining time, I could go to the basement and swap the laundry right on time, not too soon and not too late.
However, my WLAN does not reach the basement, so I couldn't connect the washer to the Home Connect cloud. I tried PLC, but that made my DSL connection instable, so it wasn't a solution either. I pondered about buying an LTE router, but the data tariff would cause monthly costs that I wasn't really willing to pay.
Then I discovered LoRa, which is a radio communication technique that is specially designed for Long Range (hence its name) communication, with a range of up to several kilometers (on optimal conditions). It should be easy for LoRa to send data from the basement to my flat, and indeed, a first test was successful.
LoRa solves the problem of transporting the data. However, it comes with a price: The individual data packages are very small (about 50 bytes worst case), and in Europe there is also a 1% duty cycle restriction that needs to be respected. So it wasn't possible to just connect the washer to the Home Connect cloud using LoRa as some kind of WLAN repeater.
Instead of that, I would have to connect to the washer directly, read its state and compress the information to what I actually need, before sending it. The problem is now that the connection between the appliance and the Home Connect cloud is proprietary and encrypted.
I found the solution to that problem in a blog post "hacking your dishwasher" by Trammell Hudson. By smart reverse engineering, Trammell was able to find a way to directly connect to his home appliances, without having to go through the Home Connect cloud. This was the last part of the puzzle that I needed.
Concept
 With Trammell's work, I was able to connect to my washer and read its current state. Basically, the washer is sending key-value pairs via JSON, where the key seems to be a 16 bit integer, and the value is mostly also an integer, but could also be a boolean or a string. This information can be easily compressed into small LoRa packages, as I mostly need to transport numeric key-value pairs.
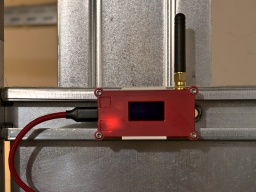
So there is a LoRa "sender" at the basement. It spawns a WLAN access point that the washer connects to. It then communicates with the washer, retrieves its state change events, compresses them, and sends them out via LoRa.
In my flat, a LoRa "receiver" uncompresses the information. From it, JSON bodies are generated and sent to my home automation's MQTT queue. The generated JSON bodies resemble those sent by Home Connect. A display that is connected to MQTT shows the current progress and the remaining time of the washer. I will also get a message on my phone when the washer is completed, or if an error has occured.
Implementation
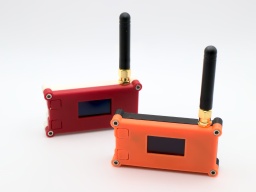
 For the implementation, I bought two Heltec LoRa32 V2 modules. They are based on an ESP32, with a LoRa module and an OLED on board. With a few modifications to the source, any other Semtech SX1276 based LoRa module can be used. For a proper housing, I created a 3D printed minimal Heltec LoRa32 V2 case.
Thanks to Trammell's hcpy source code, it was surprisingly simple to write a C++ class for the ESP32 that opens a web socket connection to the washer and starts communicating with it.
As mentioned above, the washer is sending JSON messages that contain mostly integer based key-value pairs. To stuff as much information as possible into a single LoRa packet, I came up with a simple compression. The first byte is stating the type of information, followed by a 16-bit integer key, optionally follwed by the value. These are the possible types:
- 0: Represents the constant
0 (so no value needs to be transported)
- 1: Represents an unsigned 8-bit integer (so the value consumes 1 byte)
- 2: Represents a negative unsigned 8-bit integer (the positive value is transported, and then negated on the receiver side)
- 3,4: The same, but for 16-bit integers (the value consumes 2 bytes)
- 5,6: The same, but for 32-bit integers (the value consumes 4 bytes)
- 7: A boolean constant
false (so no value needs to be transported)
- 8: A boolean constant
true (so no value needs to be transported)
- 9: A string (followed by the null-terminated string as value)
These key-value pairs are collected until the LoRa package is full or the sender is flushed. A length byte is added that contains the total length of the pairs, so the receiver is able to unpack all of them again.
To secure the communication, a SHA256 based HMAC is generated. A random 16 bit package number is added as well, which is used by the receiver for acknowledgement. Finally, the package is encrypted using AES256.
The receiver side will unencrypt the package and generate an HMAC, using a shared secret. If the HMAC matches, an acknowledge package with the package number is sent back to the sender. After that, the payload is uncompressed and converted to JSON strings that are sent to MQTT.
It is important to know that the transport encryption is not state-of-the-art. There are several sacrifices that had to be made to keep the LoRa transport small and simple:
- Only the first 4 bytes of the MAC are used, for space reasons.
- The RSA256 encryption does not use a mode of operation, mainly because it would be hard to re-synchronize the LoRa connection if a package was lost. On the other hand, we are only sending the washer state. If someone would want to find out whether the washer is running or not, they could just check if a package has been sent within the past minute.
- The transport is not secured against replay attacks. The receiver should provide a random nonce, which is then used by the sender for the next package. This is something that should definitely be addressed.
So the LoRa connection provides an acceptable encryption, and is also protected against lost packages, since the sender will reattempt to send the package if there was no acknowledgement from the receiver.
Configuration
 The trickiest part of the project is probably the configuration.
To directly connect to the Home Connect appliance, an encryption key and (depending on the protocol) an initialization vector is required. Both parts cannot be retrieved by the public Home Connect API, but you need to trick the API into thinking that you are connecting from the Home Connect app. This is where Trammell's hcpy project comes into play. It will let you log into your Home Connect account, and then extract a profile of your appliance and writes it into a config.json file. This file is required for setting up my project.
The config-converter.py in my project will take this config.json file and extract all the necessary parts from it. It will print the appliance's key and iv values for your sender/config.h. It will also create a new random shared secret for the LoRa encryption. And last but not least, it will create a receiver/mapping.cpp file, which is used to convert the integer keys and values to strings similar to the Home Connect API.
If you came this far, you made the hardest part. After that, the LoRa transceivers need to be configured. Unfortunately the parameters depend on the country where the sender is used, so there are no general default settings.
The following values are proposals and are only valid for countries of the EU. You are responsible to find the correct settings for your country. Failure to do so may result in legal problems, claims for damages, and even imprisonment.
LORA_BAND: This is the frequency used for LoRa transmissions. For EU countries this is usually 867E6.LORA_POWER: The power of the LoRa sender, in dB. For EU countries this must be 14 or less.LORA_PABOOST: true for EU countries.LORA_SPREADING: The spreading factor. For EU countries, values between 7 and 12 are allowed. Higher values span longer distances, but also exhaust the permitted 1% duty cycle sooner. You should use the lowest possible value that gives a stable LoRa connection, and rather try to enhance reception by finding a better place for the LoRa devices or by using better antennas. The value should be 9 or less, as the duty cycle limit is likely to be exceeded with higher spreading factors.LORA_BANDWIDTH: The bandwidth, must be 125E3 in EU countries.LORA_SYNCWORD: A sync word. You can choose basically any values, or just use the default 0x12.
Make sure that the sender and the receiver are using the same settings, otherwise the transmission will fail.
The other settings are mainly about the WLAN access point for your appliance, the WLAN settings of your home network, and the credentials to access your MQTT server.
And that's it! Actually it was quite a fun project, and I learned a lot about ESP32 programming and LoRa networks. I also spent way too much time with it, but maybe it will pay off because I get the laundry done sooner now.
 Note to myself, but maybe you found this article via search engine... 🙂


