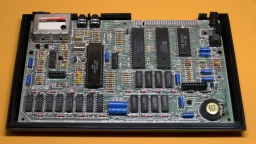
Water reflections on a roof

Action Replay

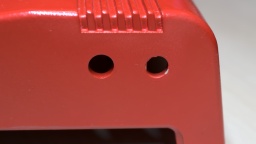
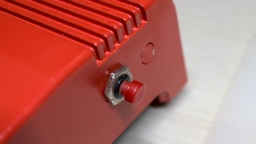
I got this Action Replay MK-I module. According to the seller it was untested, and for that reason sold as defective. It was in a… let's say very used state. The case was dirty, to a point that it was almost revolting to touch it. A side of the case was cracked open, and a knob was missing. The module must have been dropped at some time.

The Action Replay, in the sad state that I got it.
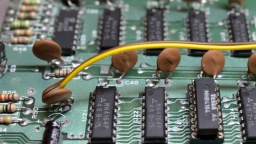
I carefully opened the case. The top and bottom shells are just stuck together, there are no screws, so it was easy to pull them apart. Inside I found some kind of coating on the PCB, so perhaps a drink had been spilled on the module as well. I also found a lot of fine paper dust like from a cardboard, and a small dent at the corner of the PCB that was caused by the drop.

Even the inside is filthy.

The first thing I did was to give the entire module a proper cleaning in an ultrasonic cleaner, just with warm water and a drop of dishwasher detergent. And yes, I also washed the PCB that way, then dried it off and sprayed it with IPA to remove the last traces of water. That bath did wonders.

Before cleaning: Dirt everywhere, and also this strange matte coating on the PCB. After cleaning, the board looks almost as new. I removed a few parts before the bath.

I expected that the dirt also reached the inside of the mechanical parts, so I decided to replace them all. They were a bit hard to find as replacement parts, but still available. As the original knob was lost, I used a different potentiometer that came with a knob. Unfortunately the new one is white, while the original one has likely been black, so I couldn't fully restore the original outside look.

New electrolytic condensors and mechanical parts for the rejuvenating cure.

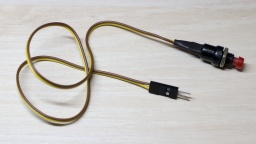
The case was cracked open at one side because two pins inside were broken off. I fixed the pins with superglue. After that I exposed the case to the sun for a day, which removed quite a bit of the yellowing. Then I could put everything together again. Compared to the original state, the Action Replay is now looking nice and clean.

The Action Replay, shiny and as good as new.

I gave it a test run in my Amiga 500, and it was working fine! Now I have an Action Replay for my Amiga collection. The only sad thing is that it cannot be upgraded to an MK-II or MK-III, as these modules are constructed differently.

Amiga 1200 Restauration

Ever since I got my Amiga 4000, I was pondering about if an Amiga 1200 would have been a better choice. I mean, the Amiga 4000 is nice because it has a lot of space for extensions. But on the other hand, it is rather bulky and heavy, so it isn't much fun to take it to a friend or a party, unlike the compact and light Amiga 1200.

But why not have both? πŸ˜‰ I had found an Amiga 1200 offer on the Bay that was too good to be ignored, so I bought it.

My new Amiga 1200, unboxed. The keys are yellowed, and the Amiga badge is just a cheap sticker.

It's an Amiga 1200 from the days after Commodore went belly up, and when Escom took over and sold the last Amiga stocks. The good news is that the Escom cases were made of ABS with an anti-UV treatment, so they will never yellow. The bad news is that the keycaps were not treated, and are very visible yellowed by now.

I sent the keycaps to the experts at the CBM Museum Wuppertal for whitening. The case itself is almost in a mint condition, all it needed was a bath in warm dishwater.

Let's take the computer apart and have a look inside.

After opening the cover and removing the keyboard.

There's a 2.5" hard disk, which turned out to contain a Workbench, a few games, and also many bad sectors. I'm going to replace it with an SD Card solution anyway. The shielding has a bit of flash rust and was bent around the ROMs, probably from forceful prying out the ROM chips with a screwdriver. Besides that, the overall status is quite okay.

The mainboard is in a good condition. I've already changed the Kickstart ROMs.

Under the shielding, I found the mainboard in a good condition, especially without flash rust on the modulator. To my surprise, it is a Rev. 1D.1 board, which was actually the first broadly sold board revision. In one of the last Amigas that have ever been produced, I had rather expected to find a revision 2 board. Anyway I was lucky because the 1D.1 revision is said to be the most stable one, and it also has a good Lisa chip that was manfactured by HP. On both CIA chips I found traces of flux, so the board seems to have been repaired before.

It's a rather early Rev 1D.1 board. I didn't expect to find that in one of the last Amigas ever sold. It also seems that this board has been repaired before.

According to my contact at the CBM Museum Wuppertal, Escom sold everything they could find at the Commodore remainders. Allegedly they also produced "new" Amiga computers with refurbished mainboards. Maybe this is one of them?

I first inserted diag ROMs and checked the hardware, but found no problems, so I upgraded the system to AmigaOS 3.2. The next thing on my to-do list was to replace the electrolytic capacitors, as they tend to leak over all those years, causing damage to the PCB. I have already done that on my Amiga 4000 before, but on this model the space was a bit more limited. I even had to remove a freshly replaced SMD capacitor because another capacitor did not fit next to it any more.

Two capacitors are overlapping. It's a tight space. Eventually I replaced all electrolytic capacitors.

To enhance the stability of accelerator boards, it is recommended to remove the capacitors E123C and E125C on the bottom side of the PCB. The easiest way is to use two soldering irons like a pair of tweezers.

The bottom side, with E123C and E125C removed.

After a thorough wash with IPA, the board was then ready to move back into the case.

The board after recapping, ready to move in again.

I want to modernize the Amiga so it can be connected to a HDMI monitor. The RGB to HDMI solution of the Amiga 500 won't work on the AGA chipset though, so I decided to get an Indivision AGA MK3 from Individual Computers. It is plugged onto Lisa and one of the CIA chips, and offers an HDMI output even with sound. (Which is quite an accomplishment, as both chips are not connected to a sound line.)

Since I was on it, I also extended the memory with an ACA1211. Unfortunately it turned out that AmigaOS 3.2 is incompatible to the ACA1211, and the system won't boot in this combination. I had to return to the original AmigaOS 3.0 ROMs again. Eventually I traded the ACA1211 for an ACA1234, which is also an accelerator and works fine with the latest AmigaOS.

To make the wire mess complete, I replaced the floppy disk drive with a GOEX drive from Centurion Tech.

The Indivision AGA MK3 and the ACA1211 mounted. The GOEX floppy simulator replaces the original floppy disk drive.

Centurion also offers LED boards with customized colors. I have picked blue as power LED, green as floppy drive LED, and red as harddisk LED.

New LEDs in my favorite colors! 😍

In the meantime, I got the whitened keycaps back. They were almost white again, but sadly there is still a slight, but visible yellow tint. Maybe I will buy a new set of key caps once they are available. The Amiga would then look as new.

The original Escom label is just a cheap sticker. It looks ugly to me, so I replaced it with a replica Commodore badge.

And then, for the first time after my purchase, I could close the Amiga 1200 case again.

This is my refurbished Amiga 1200/030.

Please welcome the newest addition to my Amiga collection!

Open-Sourcing old Amiga software

The Yamaha YM3623B Digital Audio Interface Receiver on a MaestroPro sound board After 22 years, I released an update of a software I wrote in the end 1990's for the Amiga platform. It is a driver for the MacroSystem MaestroPro, a fully digital sound board. Along with the update, I have opened the source code of that library.

The sound driver itself is not that interesting, actually. I don't think there are many people on this world still using the sound board. What's more interesting is how I changed the project, to make it open-source and compilable under Linux and other modern platforms. That's what this article is about.

Versioning (or the lack of)

The first problem I faced was rather unexpected. Back in the good old Amiga days, I hadn't used revision control systems like CVS. Being just a hobby developer, I didn't knew about their existence nor their purpose. Instead, I frequently made backups of my source codes, so I wouldn't lose them in case of a harddisk failure, or after a botched code redesign. But besides that, programming was a surgery on the open heart of the source code, with no way to revert to a previous state that was known to be working.

As result, I found multiple different versions of the project on my Amiga harddisk, and I had to figure out what the latest one was. In this project I was lucky, because I had added a changelog to the main file of the source. I just had to find the copy with the most recent changelog.

Without a revision control system, the source of all older releases are lost, so I didn't even try to recreate a history from the backups. The last version on the Aminet was V41.40, but I couldn't find the source of that release any more. What I found instead was a V41.50 that was never released. I cannot remember why I decided not to release that version. Maybe the changes turned out to be a regression? Maybe I just lost interest in the Amiga, and didn't bother to release it any more?

Anyway, I could at least find the latest version of the source code. What to do with it? As I became a professional software developer since then, it was clear to me that I would not go on with just keeping the latest source code version (and some random backups), but I wanted to use a revision control system now.

I prefer to use git today. It would fit nicely into my development environment, and would permit to publish my source codes in my GitHub repository. But git was never ported to the classic Amiga, and probably never will due to its complexity.

Olaf Barthel did a port of subversion though. The last release was in 2009, and bases on a very old Subversion version 1.1.4. It wouldn't be much fun to use it, but it would be feasible.

There is also a CVS port made by Frank Wille, but I never really liked CVS, so this was no option for me.

So svn and git were the only candidates, with a strong preference to use git, but svn as the only option that would work on AmigaOS. The decision was connected to the next question.

Compilation

On what platform do I want to continue developing?

I could go on and develop the project on the Amiga, like I did in the 1990s. I had everything I needed there. I used GoldEd as editor, with customized macros for compiling my projects. I used PhxAss as assembler, and SAS/C as C compiler. None of this software is still maintained, and SAS/C was a commercial product that is not available any more. With these strict requirements, just a few people would be technically able to participate in the project.

Today, Amiga enthusiasts use the vbcc toolchain for development. It is still actively maintained. And it runs on AmigaOS, but also on all major operating systems. As editor, Visual Studio Code is a preferred choice because there is an Amiga Assembly Add-on available. It supports syntax highlighting, inline documentation, debugging, and much more.

These are the missing pieces of the puzzle. With vbcc, it is possible to build the project on Linux and other platforms, so almost every Amiga developer is able to participate. Developing on Linux also enables me to use git and all the other tools I got used to. But with just a few modifications to the makefile, the project could still be built on AmigaOS.

I decided to go the Linux way, but it's a decision that every retro developer has to do for themself. Cross-building an Amiga project on Linux would be comfortable (and fast), but is not really "retro". Building on AmigaOS would be the true retro spirit, but would leave me with an outdated and partially unmaintained toolset.

Porting

It was easy to copy the source files to my Linux file system, and initialize a git project there. The next problem I faced was that I had to port the makefile. It was tailor-made to my AmigaOS environment, with special assigns for include files and binaries.

I created a new makefile that was using env variables instead. AMIGA_NDK now points to the unpacked AmigaOS 3.2 NDK, while AMIGA_INCLUDES points to the include files of external dependencies (like MUI). I installed vbcc so all the commands were in the $PATH.

After that, I restructured and rearranged all the source code files. The project now only contains my own files that are absolutely necessary for building the project. An invocation of make then builds the project on my Linux machine.

I18n

There was an unexpected problem with the charset. While all modern operating systems use UTF-8, AmigaOS does not support it, but uses ISO-8859-1 instead. The result is that the repository contained an awful mix of both charsets. All files that are intended to be used by the git environment (like the README.md file) are stored in UTF-8. Other files that are AmigaOS related (like AmigaGuide files) must be stored in ISO-8859-1 instead.

I was hoping that I could define the correct encoding for each file type in an .editorconfig file. But sadly, Visual Studio Code ignores the charset settings and instead uses UTF-8 by default. It was too easy to accidentally destroy all special characters (like the German Umlaut in my family name) that way.

The only solution I found was to use UTF-8 or ISO-8859-1 only where absolutely necessary, but for most files I used ASCII as the lowest common denominator. An own make target make check checks all files for illegal characters, enforcing the proper usage of the encodings.

Testing

Of course I want to test (and run) the result on AmigaOS, either in UAE, or on a real Amiga.

On UAE, the created files can just be copied straight to the Amiga harddisk directory, and then immediately used in the emulated Amiga.

For the real Amiga, it's a bit more difficult though. One way is to create an ADF disk file using xdftool, and copy the files to it. That ADF file can then be copied to an USB stick, and read in the Amiga using a Gotek floppy drive emulator.

A better way is to use a simple NFS server that is mounted on both the Linux and Amiga machines. Files can be easily exchanged that way. Of couse it requires that the Amiga has a network connection.

Release

Back in the Amiga days, making a release was a fully manual process. For this purpose, I had a separate directory with a release template. I manually copied all compiled files to the proper places of that template, then packed it, and uploaded it to the Aminet.
Now I want the git project to be self-contained, so all the files of the release template are in the distribution directory. The make release target builds the entire project, then creates a fresh release directory, copies all the files to the correct places, and creates an lha package.
On a modern Linux machine, the entire process (from a clean checkout to the distribution package) takes less than a second. 🀩

And that's it. The source of the maestix.library is now open and available at GitHub. The first release that was built on the new environment, can be downloaded from the AmiNet.

CI/CD

You may have laughed now, but it's true: It is possible to do CI/CD with Amiga projects!

vamos is a virtual Amiga runtime environment that permits to run simple Amiga commands on Linux. It's just a CPU and API emulation, not a full-blown emulator like UAE, but it is sufficient to run unit test suites.

There are Docker images like docker4amigavbcc that, for example, permit to automatically build commits using GitLab CI.

And since it's easy to upload new packages to the AmiNet, even Continuous Deployment would be possible. Just create a version tag, and let your CI/CD chain do the rest. πŸ™‚

Altogether, it is possible to develop these retro projects in a state-of-the-art fashion, with a modern IDE, source versioning, platform neutral development, unit tests, and even CI/CD.

Amiga Assigns

AmigaOS was an operating system that was way ahead of its time. It had features that other home operating systems (like Windows or MacOS) were missing back then, like preemptive multitasking. There was also a feature that was called assignments. I truly miss that one on Linux!

An Amiga "assign" is a bit similar to the drive letter you may know from Windows. For example, the Windows path C:\example.txt refers to a file called example.txt in the root directory of the main partition, while the same file on the first floppy drive is called A:\example.txt.

On Amiga, the main partition is usually called DH0:, the second partition is called DH1: and so on, while the first floppy drive is called DF0:. A similar path on the Amiga would thus be DH0:example.txt or DF0:example.txt.

As you can see, on the Amiga a "drive letter" can actually consist of multiple characters and also numbers. This is called an assignment. The name DH0 is assigned to the main harddisk partition.

But wait, there is more!

You can have multiple assigns pointing to the same target. For example, the main partition usually contains the Amiga desktop environment, called Workbench. For this reason, the main partition also has a label like Workbench, and the file could also be accessed as Workbench:example.txt.

This is actually quite a smart concept, especially for exchangeable media. For example, let's imagine we have just started a game called shredzone, and it needs to access a file Music/Opening.mod on its installation disk (AmigaOS uses a slash as file separator, like all proper operating systems). It would open a file called shredzone:Music/Opening.mod.

AmigaOS would see that there is no assignment called shredzone, and would pop up a dialog like this:

From a user's perspective, I would now know that I have to find a medium called shredzone, and insert it into the computer. It does not matter if it's a floppy disk, a CD, or even a network mount. AmigaOS also does not command me to insert the medium into a certain drive. If it's a floppy disk, and I have multiple floppy drives, I can just pick the one I like to. AmigaOS will then detect that a medium with that name was inserted, would close the dialog, and grant the game access to the file.

On Linux, I would need to access that medium under a path like /run/media/shred/shredzone, which is a lot to type, contains my user name, and is harder to remember than just shredzone:.

But wait, there is still more! πŸ˜„

It is easy to add assignments to the system via command line. It's even possible to use subdirectories as assignment target. Let's stay with our shredzone game example. I got tired of having to insert the installation disk every time I want to play that game. So I create a directory called DH2:Games/Shredzone/Files on my hard drive, and I copy all files of that disk to that directory.

After that, I enter this command on the command line:

assign shredzone: DH2:Games/Shredzone/Files

Now, when I start the game, AmigaOS will see that there is a shredzone assign already existing, and will access the files there. So the song file shredzone:Music/Opening.mod would be accessed at DH2:Games/Shredzone/Files/Music/Opening.mod.

AmigaOS makes use of assigns itself. For example, there is a standard assignment called C:. It usually points to the C directory of the booting device, where all command line commands (like dir, copy, delete etc) are expected to be present. This assign is similar to what $PATH is to a Linux shell.

Imagine I have installed a set of development tools, like an assembler and a C compiler. The commands of this toolset can be found at DH1:Development/DevTools/C. On a Linux system, I would add this path to the $PATH env variable, so I can just type the command name to execute one of these commands.

On AmigaOS, I just add this path to an existing assignment:

assign add C: DH1:Development/DevTools/C

Now AmigaOS knows that when I enter a command in the command line, it has to look for it in Workbench:C, and if it's not found there, it will try to find it in DH1:Development/DevTools/C. I could even execute commands like dir C:, and see all files in both directories. Of course, it is not limited to two targets.

There is still more, like deferred assigns. But I only want to give you a general impression of what Amiga assigns are, and why I miss them on Linux.

How to burn Amiga EPROMs

TL866II Plus with EPROM adapter and MX27C4100 EPROM With the recent AmigaOS 3.2 release, and the prospect of further updates, it may be interesting to burn own EPROMs for the Amiga. Luckily there is no need to buy expensive equipment any more, as EPROM burners and erasers became affordable. This article explains how I burn Amiga EPROMs at home.

Shopping List

First of all, we will need fitting EPROMs of course. These types are compatible to most Amiga models:

  • AMD AM27C400
  • Macronix MX27C4100 [sic!]
  • STMicroelectronics M27C400

It is important to pick parts with an access time of 200 ns or faster. Models like the Amiga 4000 can even be jumpered to an access time of 160 ns. EPROMs with 120 ns (or less) are easy to find, and definitely on the safe side. Note that Macronix truncates the trailing zero, so a MX27C4100-12 actually has 120 ns access time.

For burning the EPROMs, I use an XGecu TL866II Plus programmer and a 27C400 programming adapter.

Unlike modern flash memory, EPROMs cannot be erased electrically, but are erased by exposing the chip behind the quartz glass window to a strong UV light source. For this reason, an EPROM eraser is also recommended. Note that there are OTP-ROMs without that window, they cannot be erased at all.

With a bit of nail polish remover, the AMD 27C400 retransformed to MX 27C4100. No EPROM shaming here! πŸ˜‰ None of these EPROM types are still in production. You might still find sources who sell NOS parts, but usually all chips on the market are refurbished. I am a bit careful with chips that look too new, or are claimed to be made by AMD. It is likely that these are just Macronix chips that were painted black and then laser-engraved with a fake AMD label. A cotton bud and a bit of nail polish remover will quickly reveal the scam.

These fake parts are perfectly fine. They are just sold at a higher price because of the alleged noble AMD origin, so you might as well order the Macronix chips directly and save money.

Preparation

Before burning a ROM dump, all even and odd bytes need to be swapped. For Amiga models with two ROM sockets, these dumps also need to be split into separate images for the upper and lower word. To make things even more complicated, a 256KB ROM dump needs to be duplicated to fill the entire memory space of a 512KB EPROM.

Luckily, the AmigaOS 3.2 CD already provides *.bin files that are ready for burning. For plain ROM dumps (those that can be used in emulators), my tool pynaroma can be used for byte-swapping, splitting, and duplicating.

Burning ROM

For the TL866 programmer, I prefer to use the minipro controller software. It is open source and runs on Linux, MacOS and many other Unix derivates, while the manufacturer's original software requires Windows.

The programming adapter is inserted into the programmer, and EPROM inserted into the ZIF socket of the adapter, with the notch pointing to the top, and the chip aligned with the bottom of the socket. Do not put the EPROM into the programmer without that adapter, otherwise it will be destroyed during operation.

The adapter simulates the pinout of an AM27C4096 EPROM, so --device 'AM27C4096@DIP40' must be selected. The --skip-id option must be given as well, otherwise minipro would abort the process because it detects a different type of EPROM.

For writing, the --no_id_error option needs to be used instead. By default, the AM27C4096@DIP40 profile uses a programming voltage of 13V, and a writing voltage of 6.5V. On my chips VPP=12.5V is printed, so I reduced the programming voltage with the --vpp 12.5 option. It might also be necessary to reduce the writing voltage using the --vdd option. Check the datasheet if in doubt.

The first step is to check if the EPROM is empty.

minipro --device 'AM27C4096@DIP40' --skip_id --blank_check

If it's not, it must be erased first. 15 minutes of UV light exposure in the EPROM eraser should be sufficient. If the EPROM still isn't empty after that, just repeat the process.

After that, the ROM image (e.g. amigaos.bin) can be burned to the EPROM:

minipro --device 'AM27C4096@DIP40' --no_id_error --vpp 12.5 --write amigaos.bin

minipro will automatically verify the content after burning, but you can also verify it manually:

minipro --device 'AM27C4096@DIP40' --skip_id --verify amigaos.bin

And for the sake of completeness, this is how to read the content of a burned EPROM to a ROM image file:

minipro --device 'AM27C4096@DIP40' --skip_id --read amigaos-read.bin

After burning, the window should be covered to protect the chip from stray UV light. A simple paper sticker is sufficient.

#Advertisement? This blog is free of ads. All shown products have been paid by myself.
Friday, October 29, 2021