My first home computers were made by Sinclair, and I liked them. Then one day, my brother brought a Commodore 64 that he had borrowed from a classmate. He showed me a demo called "Trap", and I was flabbergasted about the sound abilities of the SID chip. My ZX Spectrum just had a plain beeper, and since then I wished Sinclair had added a decent sound chip. Or that I had a C64 instead of the Speccy.
35 years later, this wish came true as I bought my first C64. It came in a case that is painted in a bright red color. It was sold as broken. The PLA chip was missing, and there was no way to test if that was the only problem.
The machine arrived here in a pretty good state. The paint job was actually quite well done, and everything was nice and clean. It certainly wasn't much used after the previous owner did the modification. I also found traces of further planned modificiations, like numbers painted on the PCB. Maybe the machine broke during their modification attempt, ending their endeavor.
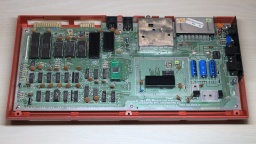
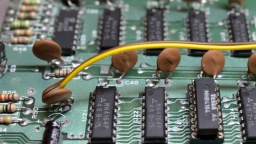
Let's have a look inside. There is a 250425 mainboard, and the PLA chip was missing as announced. I also found that all other chips were made in 1984, except of the VIC which was made end of 1985. This might be a bad sign, maybe they swapped the good VIC with a broken one before selling the machine.
I first powered up the board and checked the voltages. The +5V and +12V were fine, so I could be sure that I wouldn't damage the replacement parts I was going to put in.
For the missing PLA, there is a choice of modern FPGA based replacements. I chose a PLAnkton, which just fits into the socket and even has about the same color as the main board. After that, I connected a monitor and powered up the machine again. I got a video sync, but the picture was black. Uh oh… Is it the VIC?
A C64 Dead Test cartridge quickly gave a hint. It flashed the screen four times, saying that the U23 DRAM chip was broken. Fortunately these are 4164 type 64Kx1 DRAM chips, like they are also used for repairing ZX Spectrums. I have a few of them in stock, so I could just replace it.
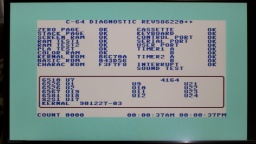
Next test, and this time I finally got the famous blue READY prompt. A full diagnostics run confirmed that the missing PLA and one DRAM chip was all that was broken.
The board is now working again, and ready to be futureproofed. First I replaced the electrolytic capacitors. For C13, I used a bipolar capacitor, which (in my opinion) gave an audible enhancement to the SID audio quality. The old 78xx voltage regulators were replaced by Traco Power DC/DC converters that won't need heatsinks. What got heatsinks instead were the CPU, SID, and VIC. The PLA should get a heatsink as well, but the PLAnkton replacement only consumes a fraction of the original PLA power and stays cold.
I also found four MOS-77xx chips on the board. These are standard 74LS chips, but they are notorious for their high failure rate. I preemptively replaced them with their standard counterparts. The mainboard should now be fine for the next twenty years.
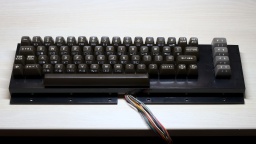
The keyboard was in a very clean state, but anyway I decided to disassemble and wash it. I pulled off all keycaps and cleaned them in an ultrasonic bath. I also removed the back PCB, and cleaned the plungers and contacts with a bit of IPA. After that, I reassembled the keyboard. For the space key, I put a bit of silicone grease on the lever mechanics, which gave a much more quiet and satisfying sound when the space key is pressed.
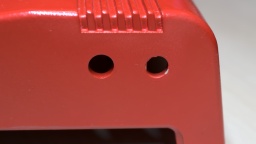
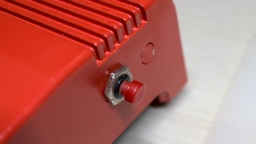
The previous owner added two extra buttons to the right side of the case. One button is a reset button, a standard modification on a C64. The other one was connected to the "bus available" pin of the expansion port. It essentially freezes the system as long as the button is kept depressed. I have no use for a freeze button, so I decided to put the reset button back, but leave the freeze button out.
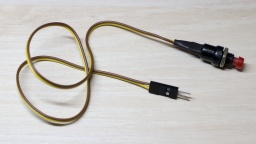
I connected the reset button to C34 instead of the expansion port. When pressed, it will retrigger the reset monoflop by discharging the capacitor. This way the button is debounced, and the reset signal is kept for an appropriate minimal time. (C34 applies to 250425 boards only, for other versions see their schematics! Also make sure you're not accidentally shorting one of the decoupling capacitors.) I used Dupont connectors to make the reset button detachable from the mainboard, in case I want to remove the top shell again.
To close the hole of the former freeze button, I was quite lucky that the case was painted in RAL 3020 "traffic red". I found that I have filament in the same color, and 3D-printed a small plug that was then hot-glued to the case. The hole is still visible, but it looks acceptable now.
And that's it! I finally have my own, red C64!


