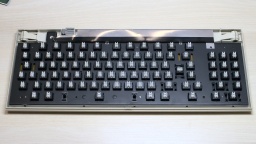
In this second part, I will take care about the keyboard. I expected that it would be the usual procedure: Cleaning the key caps and case, whitening the yellowed parts, dusting off the keyboard frame.
However, this time it wasn't that easy.
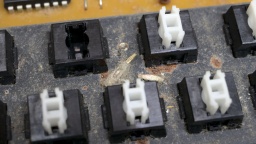
The trouble started when I pulled off the key caps, but also pulled out the plungers of three keys. Fortunately this can be repaired, as the switches are easy to maintain. More about that below.
Keyboard Cleaning
The key caps were cleaned in an ultrasonic bath with a drop of rinse aid, and then brushed with a soft toothbrush.
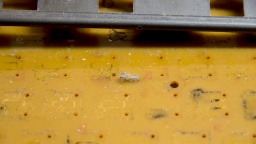
Below the key caps, there is the keyboard frame where the switches are mounted. I found the usual filth that you would expect there after almost 40 years, but there was also flash rust, a crusty dirt layer, and… dead insects. I went outside and brushed off the insects and all the other loose dirt. Then I went back inside, and sprayed the frame with IPA, in an attempt to clean off the crust. The room immediately filled with an unhealthy stench of dust, dirt, and insect excrements. 🤢 Also, my attempts to remove the flash rust with a fiberglass pen wasn't really successful. There was too much of it.
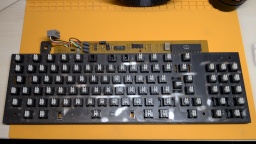
I wanted to avoid that I had to refurbish the frame, because it can only be removed after unsoldering all 91 switches (and one LED). But there was no other way to do it. So I unsoldered everything and removed the frame. On the PCB, I found dried stains from a liquid (maybe from a soft drink that had been spilled over the keyboard), and more dead insects. It confirmed that it was the right choice to go all the way.
I sanded down the old paint and the dirt crust from the frame (outside, and wearing a good filter mask). Then I spray-painted it in a matte black. It's looking so much better now.
Refurbishing the Switches
The next bad surprise came when I was about to reassemble the keyboard. I tested all 91 switches for continuity when closed, but found only about 40 of them actually working. When I depressed the other keys, they either did not close the contact, or the plunger got stuck, or both.
The switches that are used in the Amiga 1000 keyboard are Mitsumi Type 2 tactile switches. They are out of production by today, but they are easy to maintain. After trying the best approach with a couple of switches, I found the following procedure to be most successful.
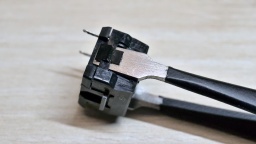
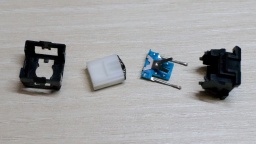
The switch can be opened by putting a kind of blade (like the head of a flat screwdriver, or flat pincers) into the latch on both sides, and then carefully removing the cap with a blade or another screwdriver. The switch consists of four parts: The cap, the plunger, the switch plate, and the base.
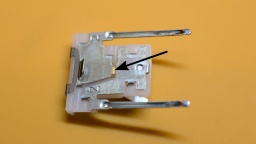
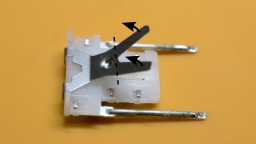
I cleaned the switch plate with contact cleaner spray. I also bent up the legs of the lever a tiny bit, so it will give a bit more pressure on the switch when the key is depressed.
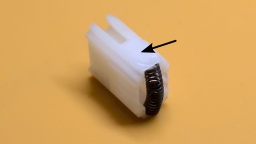
Finally, I applied a bit of silicone grease on both small sides of the plunger. It is important to use a very very tiny amount! If too much is used, the key will feel sluggish or might even get stuck. If in doubt, better skip this step.
After that, the switch was reassembled and tested again. If it was still getting stuck or didn't close the contact properly, the process was repeated.
It was a lot of work and a monotonous task, but at the end I could make all the switches work again.
Whitening
The keyboard case was cleaned in soap water. After that, the case (and the yellowed space bar) were exposed to the July sun for whitening.
The result is quite good, but on some parts a bit of yellow is still visible. I guess there would be an even better result if I would use peroxide, but I have no experience with that, and am not too keen to gain it with this rare keyboard.
The labels on some of the keys are still yellow, and wouldn't get any whiter in the sun. I guess that I will have to replace them with new labels some day.
Reassembling
With every parts cleaned and whitened, the keyboard was ready for reassembly. I pressed the key caps back on the keys, mounted the shielding, and then put the keyboard frame back into the case.
Take care when closing the case: One of the four screws is a bit shorter, and maybe also has a different color. This single screw must be used for the upper right hole.
The keyboard restauration is completed now!
In the next part, I will reassemble the main unit, and have a first test. Is the Amiga still working?

