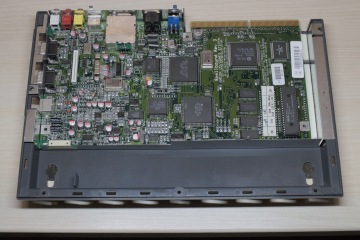
 I found this CD32 for a fair price, and bought it. The optical condition of the case is quite okay. It has some visible scratchmarks. The previous owner tried to fix them, but made it even worse. At that time, I wasn't aware yet that this would be the main theme of the whole restauration.
Together with the console, I got a PSU and an edutainment CD for learning math. The PSU wasn't the original one, but a simple power brick with a CD32 connector soldered on. The gamepad was missing, unfortunately, but I found a Honey Bee joypad as replacement a bit later.
Let's have a look inside the machine.
The State
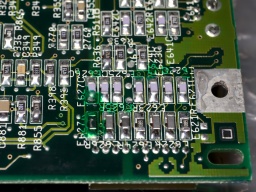
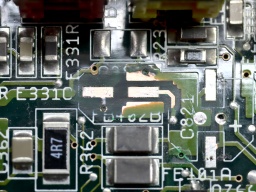
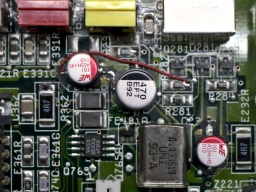
The seller sold it as broken because it showed no picture. When I opened the case, the machine told me a completely different story. There was an attempt to recap the machine. It was abandoned after replacing the TH and the 100µF SMD caps, probably because the picture was gone after that.
I also found blotches of green varnish, presumably simple nail varnish. It was under the replaced SMD caps, but also on solder joints and some vias. The varnish made no sense at all, except of maybe cosmetical reasons.
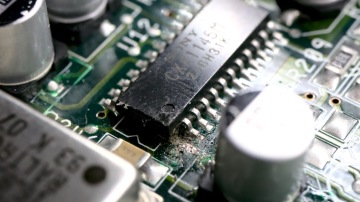
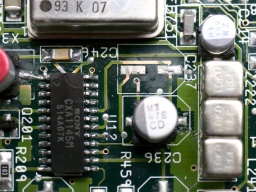
And I found this:
I assume that when the picture was gone, the guy who tried the refurbishment assumed that the video encoder chip got damaged, but had no equipment at hand to unsolder an SMD chip, and attempted to cut it from the board pin by pin instead.
I found no further traces of mistreatment of the poor board. It's going to be enough of work to fix the current mess already.
To be honest, I am pretty upset about that. There is a difference between if the machine shows no picture after decades of storage, or because of a botched refurbishment attempt. The seller should have pointed out that fact.
Fixing the Mainboard
First I attempted to restore the picture by replacing the obviously broken video encoder chip. I also replaced an electrolyic cap next to it that looked suspicious. Unfortunately that did not bring back the video signal.
The question was now whether I was getting no picture because of further errors in the video area, or because the machine is not starting at all. To find out, I inserted a DiagROM and connected the CD32 to my PC. The DiagROM started and logged no errors to the console. So the good news was that the machine is basically working.
I then decided to remove everything from the previous restauration attempt, so I could start anew with a known state of the mainboard. I removed all the electrolytic caps, even those that had already been replaced, and cleaned off the green varnish with acetone and IPA.
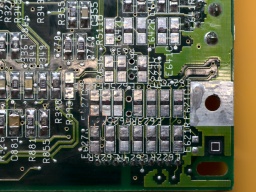
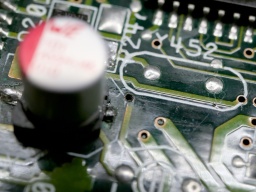
There was a strange solder blob on the bottom side, covered with a layer of varnish. When I tried to clean it up, I smelled that revealing fishy smell of old electrolyte. I generously removed the SMD parts on both sides in that area, cleaned the board and checked the tracks and vias.
Unfortunately, I ripped off a few pads on the 100µF capacitors while doing so. I guess the leaked electrolyte and the thermal stress of two recappings was just too much for them.
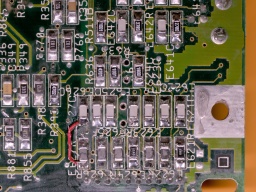
Then I soldered in new components in that area, and fixed the broken pads with bodge wire. For two SMD capacitors, the board offered an alternative use of TH caps, which I thankfully accepted. The area is now looking quite ugly, but at least it should work again.
When I checked the tracks and vias at the other 100µF SMD caps, I found broken connections at C236 and C237. They are used for the luma or composite video signal, so the broken connections caused a black image.
I also found a broken via near C409, which carries the CSYNC signal. The missing connection causes a missing video sync signal at the outputs. I fixed it by opening the via and exposing the connected tracks on both sides, then soldering a thin wire to the tracks.
So there were more than enough reasons for this board to show no video picture.
The TH capacitors on the board are a bit special. For C408 and C811, the silk screen shows the positive end at the wrong side. Even Commodore soldered in the capacitors in the wrong orientation, and you will find many CD32 out there with bloated caps at that position. I decided to solder in SMD caps there instead, which can be soldered in like shown on the silkscreen.
After that, I checked the machine, and to my amazement, it was working again:

So the mainboard was repaired and refurbished. I checked all the video and audio connectors, and found a signal everywhere. The machine was also running stable.
I'm glad that the machine turned out to be repairable.
In the next part, I will replace the laser module and calibrate the CD drive.
