 I was lucky and got hand on a Commodore A1060 "Sidecar". This first part is about the teardown of the Sidecar, and the damage assessment.
But what is a Sidecar? When Commodore released the Amiga 1000, its graphics and sound capabilities were unmatched in that price range. However, because the machine was based on the Motorola 68000 processor, users were unable to run existing MS-DOS software on the machine.
The German Commodore factory in Braunschweig tried to solve this problem with the Amiga 1060. The machine was connected to the Amiga 1000 and provided a full IBM compatible PC. Although it was a standalone computer, it had no video and keyboard ports, but was fully controlled by the Amiga. Because it was connected to the right side of the Amiga, it looked like the sidecar of a motorcycle, which gave it its nickname.
The Sidecar came relatively late to the market, could only be used with the Amiga 1000, and was quite expensive. For this reason, only a small number were produced. I could not find any official figures, but according to Dr. Peter Kittel (an engineer at Commodore Braunschweig) only between 3,000 and 5,000 units were sold in Germany, and certainly even less worldwide.
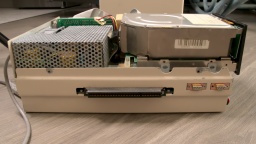
My A1060 came with an open case top. The reason was that the 5¼" floppy drive had been removed, and a full-height hard disk drive had taken its place. It was so tall that it didn't fit in the case, and it was also surprisingly heavy.
Many screws were missing or oxidized, but otherwise the machine was in used but acceptable optical condition. The previous owner had added a reset button on the front, and a second D-Sub connector on the back (which later turned out to be a second floppy drive connector, for whatever reason).
I decided to take the entire machine apart for cleaning and damage assessment. My plans are to restore it to its original state, which also means removing the oversize hard drive and its controller board.
There is a frame that holds the floppy drive and PSU. I found a lot of strange rust on it, which looks a bit like moisture damage, but that wouldn't explain the shape of the stains.
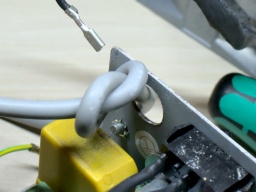
The PSU looked okay-ish. Luster terminals were used for the floppy power connector. Also the pull relief for the Amiga power cord was missing, instead I found a knot in the cord.
I gave the PSU to an experienced technician at the a1k.org Amiga board for overhaul.
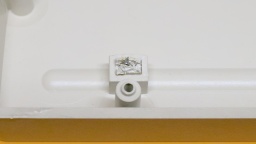
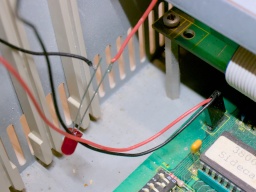
I also found that the pins of the power LED were broken off. The LED was held in place by a superglued plastic plug. It was impossible to remove without force. The replacement power LED was just hanging loosely in the case.
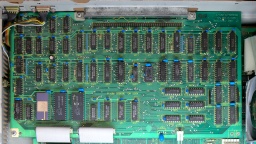
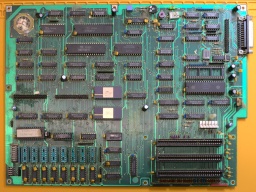
Let's dig deeper. The computer consists of two boards. The lower board is the PC compatible, with three XT bus slots, a socket for the FPU, and eight sockets for another 256 KB of RAM. The upper board serves as a bridge between the Amiga and PC side. Both boards are connected by two flat ribbon cables.
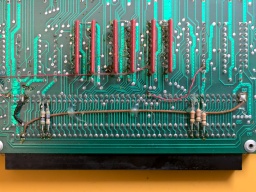
At the first glance, the upper board looked dirty, but otherwise okay. On the bottom side there are a lot of bodge wires, additional resistors, and cut traces. At first I thought that this modification had been done by the previous owner, but then I found similar photos on the internet, so it seems to be a standard post-production factory fix.
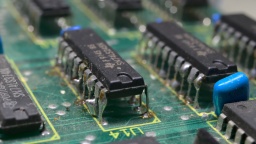
Then I found that six 74HC245 bus drivers had been replaced with 74LS245 ones. The replacement was a little "creative". The old chips were cut off the board leg by leg, and the new chips were then soldered to the remains of the old legs. This was certainly not factory-made.
On the one hand, I was glad that the previous owner did not try to unsolder the chips, as he could have damaged the board. On the other hand, it looked very DIY, so I decided to clean up the mess later.
Replacing the 74HC245 with 74LS245 turned out to be a common fix to make the Sidecar more compatible with Amiga memory expansions. I decided to keep the 74LS245, but to use sockets so that it would be easy to undo this modification.
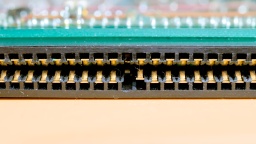
I also found that the Zorro connector was unfortunately damaged beyond repair. Two pins were broken off and another one was bent so it could cause a short.
It was impossible to find a replacement 88-pin edge connector that could also be riveted to the board, but I did find a new connector of the correct size but without the rivet holes.
The lower board was even dirtier, but otherwise seemed to be unmodified and undamaged. The buzzer, however, was rusted, so I would have to replace it.
In the end, there is a lot of work to be done:
- Clean the case, remove the rust, replace all screws
- Fix the power LED
- PSU overhaul
- Replacing all electrolytic caps, the buzzer, and the Zorro connector
- Clean up the six bus drivers at the upper PCB
- Find a new floppy drive
More of this in the second part of this article!

