 In the first part, we have replaced the old Li-Po battery by a new one. In this part, we will replace the mechanical hard disk by a modern (and much larger) MicroSD card. Both parts are independent, this is, you could also replace the HDD but keep the old battery.
First of all, you need to install Rockbox on your player. This is an alternate firmware that will not only make your iRiver experience more enjoyable, but will also support larger hard disk sizes. The installation procedure is out of scope of this article, but Rockbox is providing a great installer tool that does most of the work for you.
You must install Rockbox before replacing the harddisk. The reason is that the original iRiver firmware won't boot from larger harddisks, but you need a running player to install a patched Rockbox bootloader via firmware update.
Your shopping list:
- Toshiba 50-pin to CF card adapter – I use an HXSP-09CF69 adapter. I have tried an Adaptare 48012 adapater first, but always got ATA errors with that one. The adapter must be set to "Master" mode, usually by a switch or a jumper.
- CF card to MicroSD card adapter – I use a DeLock adapter, but any other brand should work as well. You can also just use a CF memory card, but the combination of MicroSD cards and CF card adapaters is cheaper than CF cards of equal size.
- MicroSD card – I use a 128 GB SanDisk Ultra MicroSDXC card, but any other brand should work as well. The card speed is not really a factor here. I couldn't find a maximum size that is supported by Rockbox, so maybe even larger cards will work.
As there are a lot of different adapters and MicroSD cards on the market, there is no guarantee that your combination will work. Remember that you use parts that have been totally utopian back in 2003. Also be warned that your hardware can be damaged by this modification. You do it at your own risk.
Before you move on, make sure that Rockbox is properly installed and started. Then connect your player to your computer via USB, and backup the .rockbox directory, and any other stuff on the old harddisk that you want to keep.
Also, please read the entire article first, before you start with the modification.
Prepare the MicroSD card on your PC. It must be FAT32 formatted and should be named like your player model (e.g. IHP-120). Copy the .rockbox directory from your backup to the MicroSD card. And while you're at it, use the chance and copy your music collection to the card. The access speed will be much slower once the card is in your player.
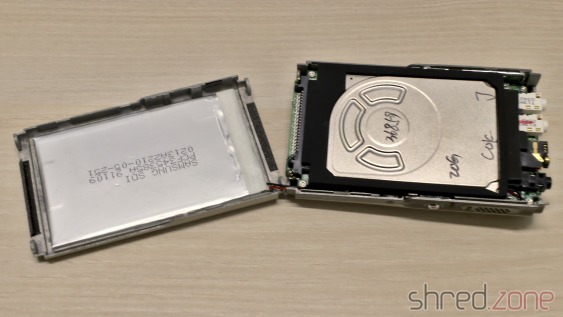
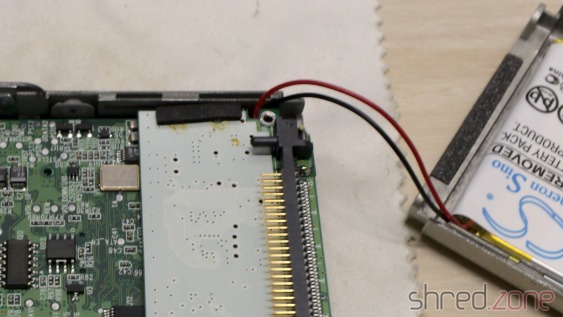
Now turn off your player, and open it again (as described in part 1). You only need to remove the back cover this time. No more disassembling is necessary.

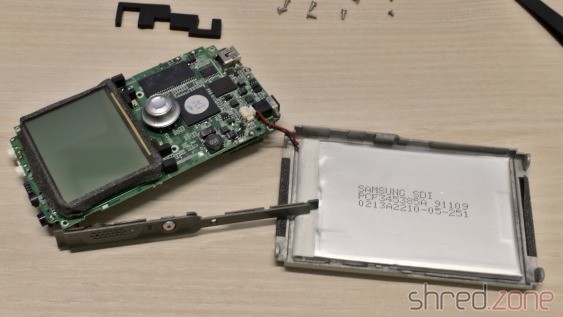
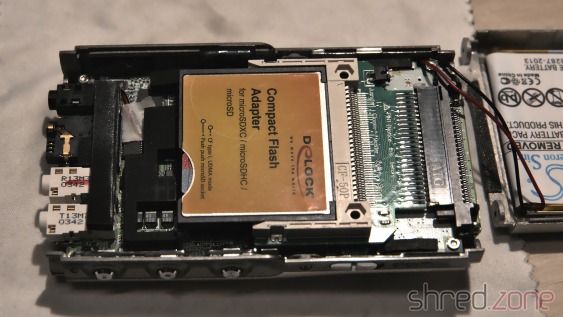
Remove the harddisk by gently lifting it and pulling it out of the connector. Now try to insert the 50-pin adapter. For many adapters, a plastic nose on the connector will keep you from inserting it, so you may need to remove protruding parts of the adapter with a file.

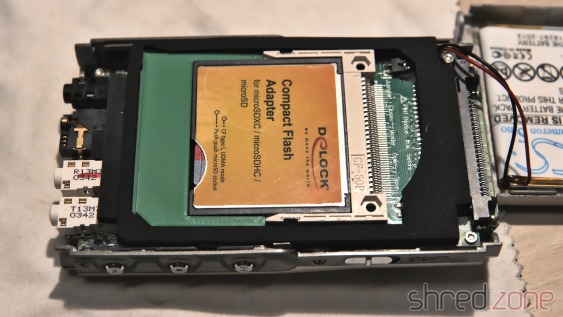
It is normal that the connector has more holes than the header has pins. Just make sure that the position marked as "PIN 1" is properly aligned with the first pin of the header. This is what it looks like when the adapter and the CF card is correctly mounted.
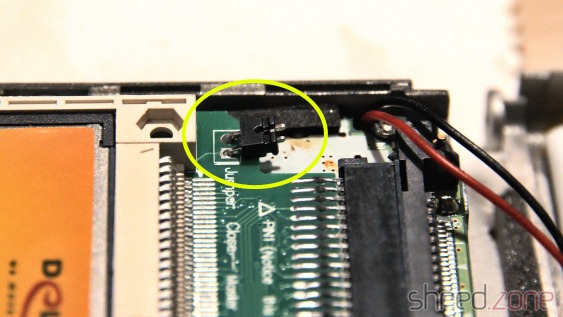
The next step is important. The adapter might have a jumper for mode selection. If it sticks out, it may punctuate the battery when the casing is closed later, so bend it away (like in the photo) or just unsolder it and replace it with a wire bridge.
Now make sure that the CF card stays in place and won't touch the PCB even when the player is carried around. You can use some isolating tape, or a silicone mat cut to size. I constructed a small 3D printed piece that fills the space and keeps the CF card from loosening. You can put back the original silicone HDD frame on top of that, to keep the construction from vibrating or touching the battery.
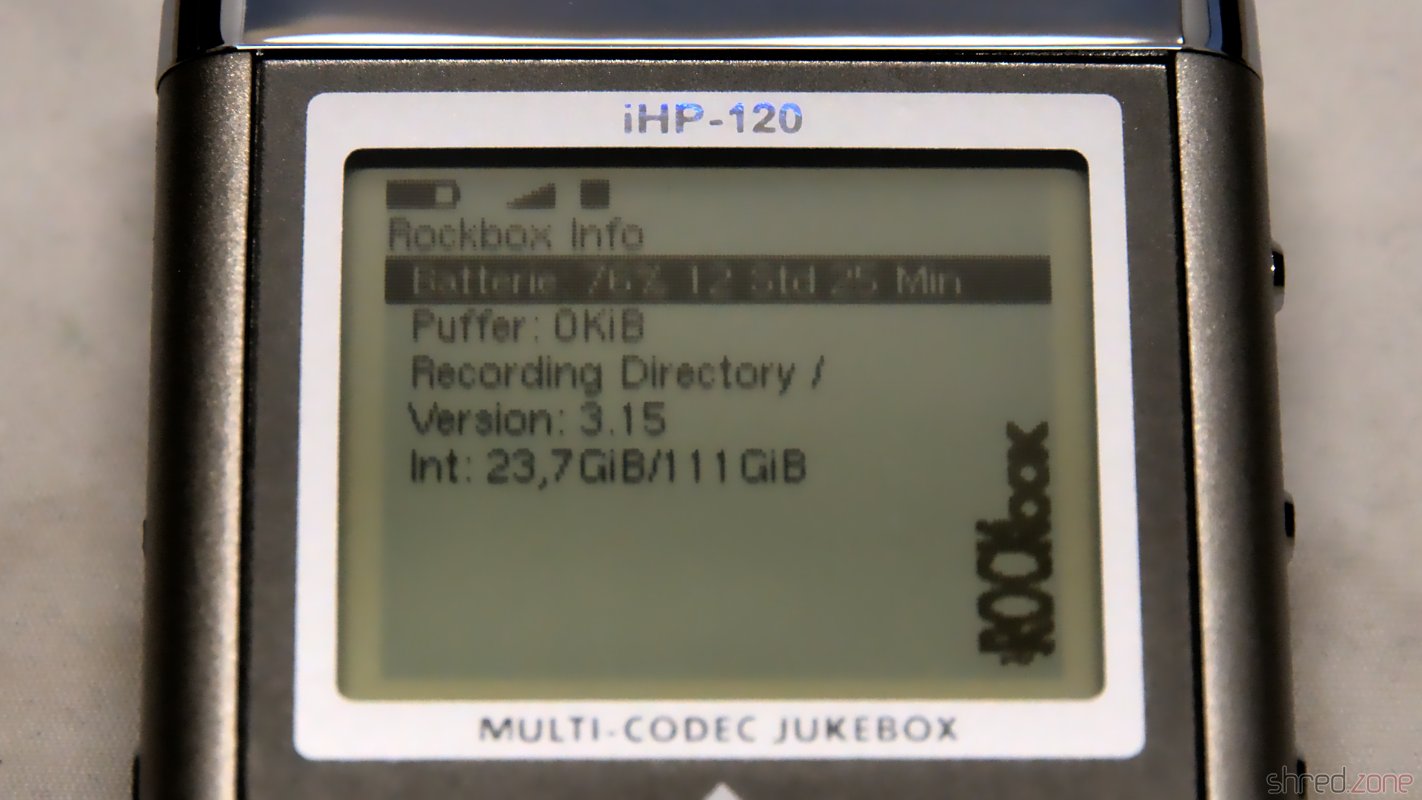
It is a good idea to do a short test drive of your modified player now. It should boot up and start Rockbox. In the Rockbox file manager, you should see all the files on your MicroSD card.
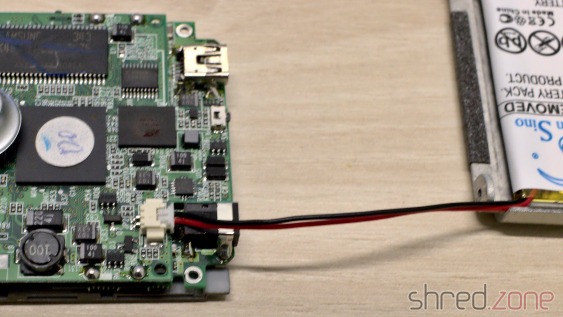
You can close your player now. Be careful and don't use force if the back cover cannot be closed, but locate and remove the obstacle. Remember that the Li-Po battery on the back cover must not be damaged or punctuated.
Enjoy your new retro mp3 player!
Troubleshooting
If you should get ATA or "check HDD" errors, it can have a lot of different causes:
- Make sure that your MicroSD card has a single primary partition, which must be FAT32 formatted. Other file systems (e.g. FAT16, NTFS) are not supported. Try a different formatter tool.
- Check all the connections. Is the adapter properly aligned and connected to the header? Is it switched to "Master" mode? Is a header pin bent or broken? (A few pins may be a bit longer or shorter than the other pins though, that's normal.)
- Remove the adapter and insert the original HDD. If your player still shows an error, the daugherboard may have been dislocated. Gently press it to the main board and try again.
- Your combination of adapters and MicroSD card brands may be incompatible. Try to boot from a real CF memory card. Try other adapter or MicroSD card brands.
If you happen to have an iHP with a broken original hard disk, you can start with the replacement right away, but use a FAT32 formatted 16 GB or 32 GB MicroSD card first. The original firmware should start in this configuration, and allow you to install the Rockbox firmware, but this is untested. After the Rockbox firmware has been installed, you can use larger MicroSD cards.
Final words…
- You do this modification at your own risk. It might not work, damage your hardware, and turn out to be an utter waste of money.
- I cannot help you if your modification won't boot or won't run stable. I have already said all I know about it in this article. Maybe you can find help in the Rockbox forum.
- I cannot print the 3D printed part for you. The stl file is available for free and can be printed by commercial print services.