The luftdaten.info project offers a build guide for a fine dust sensor. It’s cheap and easy to put together even with little electronics knowledge. You can get the parts in various electronics shops and nowadays even on Amazon.
The original kit uses two plastic pipes as a casing. They’re cheap and easy to get in any DIY store, but they don’t look particularly great. I chose a standard UV and weatherproof outdoor junction box as the casing instead. A custom-designed 3D-printed frame is placed inside, and the electronics are mounted on it.
The frame already has a wind tunnel for the drawn-in air, so unlike the original instructions, you don’t need a hose. Grids in front of the air vents stop insects from crawling into the case. Also, unlike some other printed solutions, the fine dust sensor is aligned as specified by the manufacturer, and the intake hole is protected from light.
Unlike the original guide, though, you can’t avoid picking up a soldering iron here.
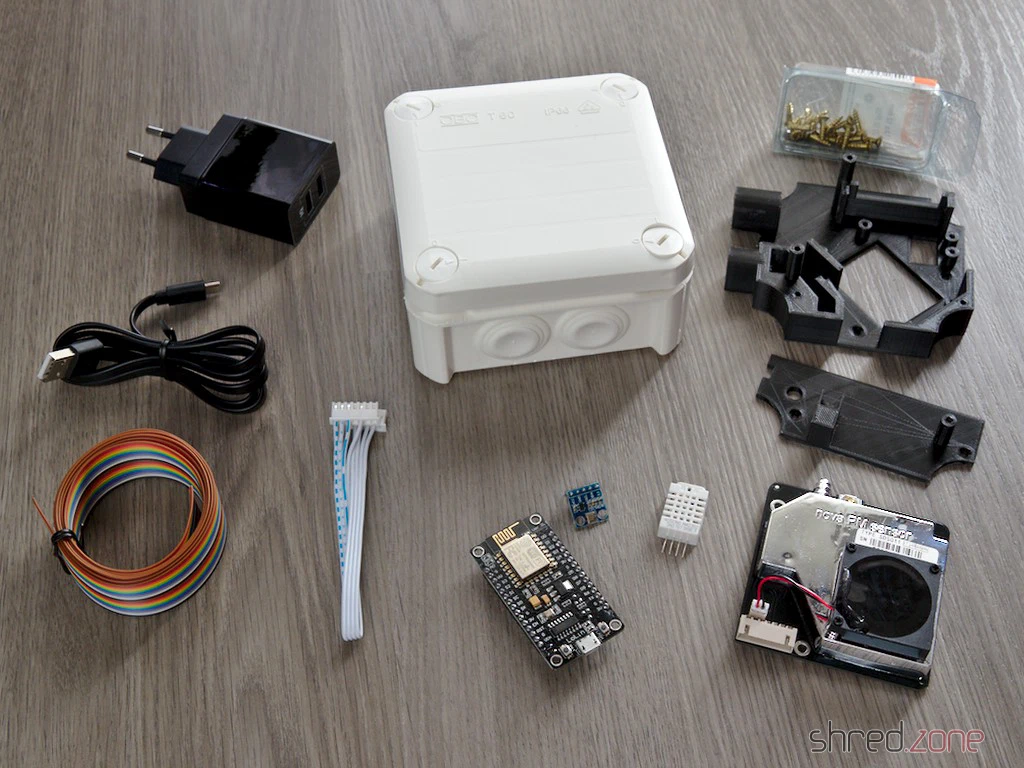
You’ll need the following parts:
- 1x set of 3D-printed frame parts
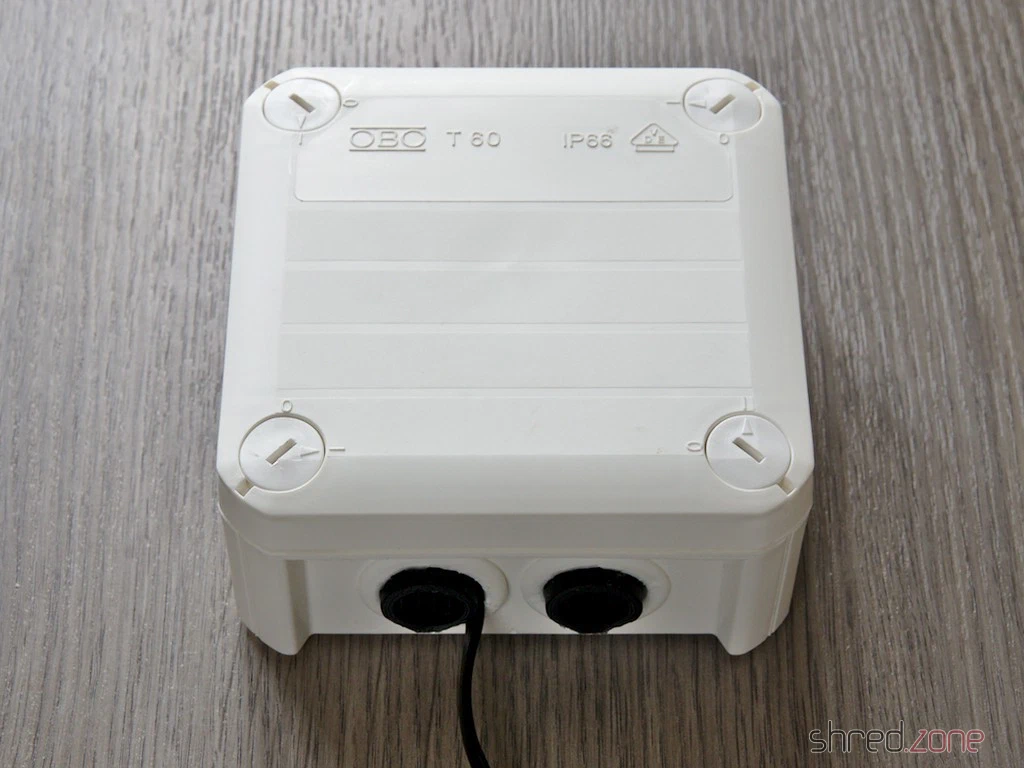
- 1x OBO Bettermann T60 junction box with plug-in seals
- 1x NodeMCU ESP8266 (by Lolin, other brands might not fit)
- 1x ILS-Nova SDS011 fine dust sensor
- 1x DHT22 temperature and humidity sensor (usually optional, but required here as it seals off a hole in the wind tunnel)
- 1x BMP180 temperature and air pressure sensor (optional)
- 11x wood screws 3.0 x 12 mm
- 4x wood screws 3.5 x 12 mm (or four more 3.0 x 12 mm)
- A bit of ribbon cable
- Some heat shrink tubing
- USB cable (flat)
- USB power supply (an old mobile phone charger is absolutely fine, the sensor needs less than 200 mA)
You don’t need any particularly UV or weatherproof filament for the printed parts, since they’re protected by the junction box. The filament just shouldn’t be so brittle that the screws break it. And it should be as dark as possible so no stray light gets into the dust sensor’s opening. I used basic black PLA.
Important: The print should be done without supports, as they are really hard to remove afterwards and could block the air duct. The parts are designed so they can be printed with PLA even without supports.
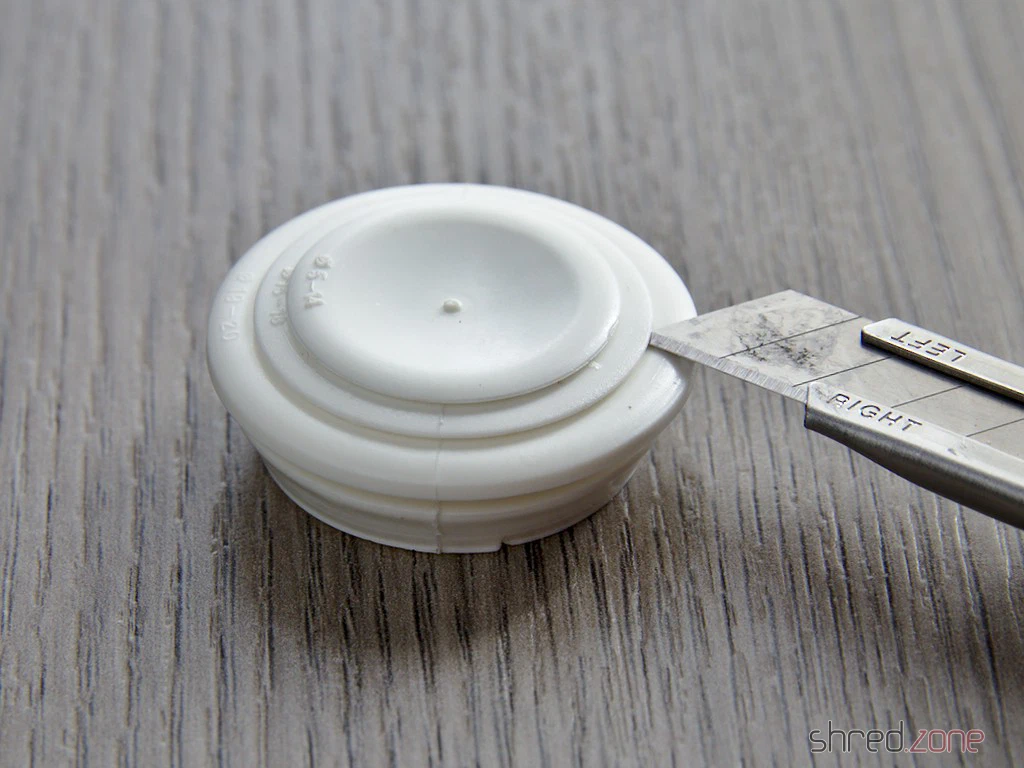
First off, remove the two plug-in seals from one side of the junction box and cut them open at a 19-20 mm diameter.
Now poke the USB cable through the left hole, then pop the lower support frame in from the inside and screw it down with the 3.5 x 12 mm screws. The casing can now be sealed up again with the plug-in seals.
It’s time to solder the electronics together according to the guide. The pins of the DHT22 should be protected with the heat shrink tubing. How to wire up the optional BMP180 air pressure sensor is explained in the FAQ. It’s best to install the firmware now and do a test run. Once the device is put together, it might be trickier.
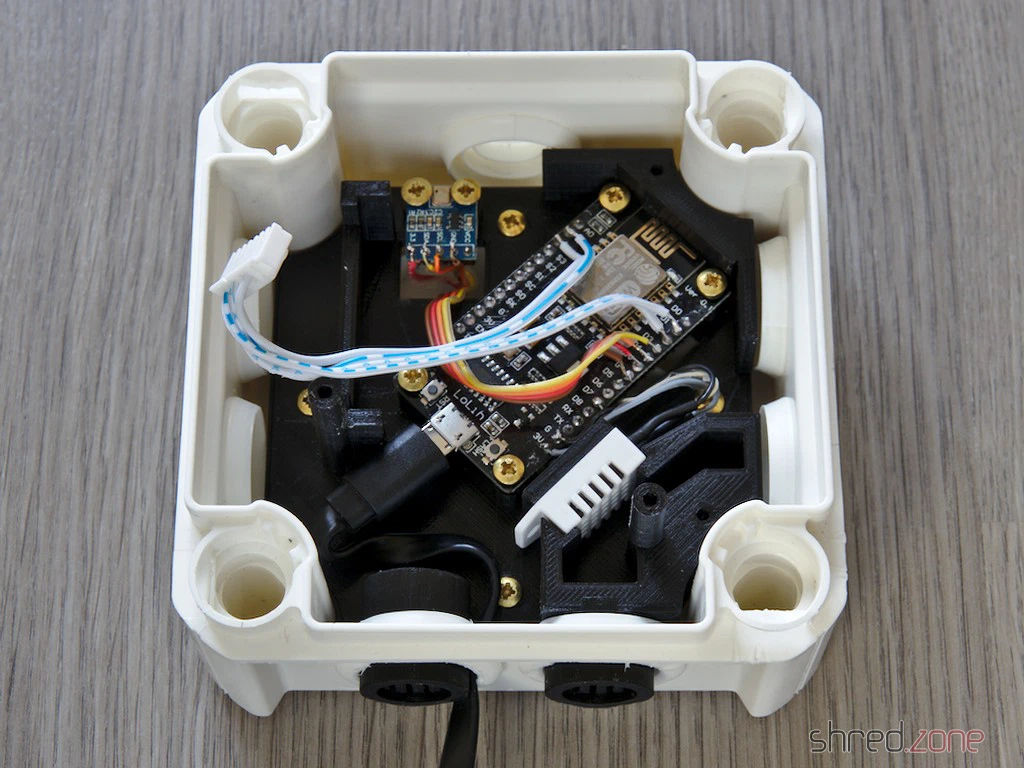
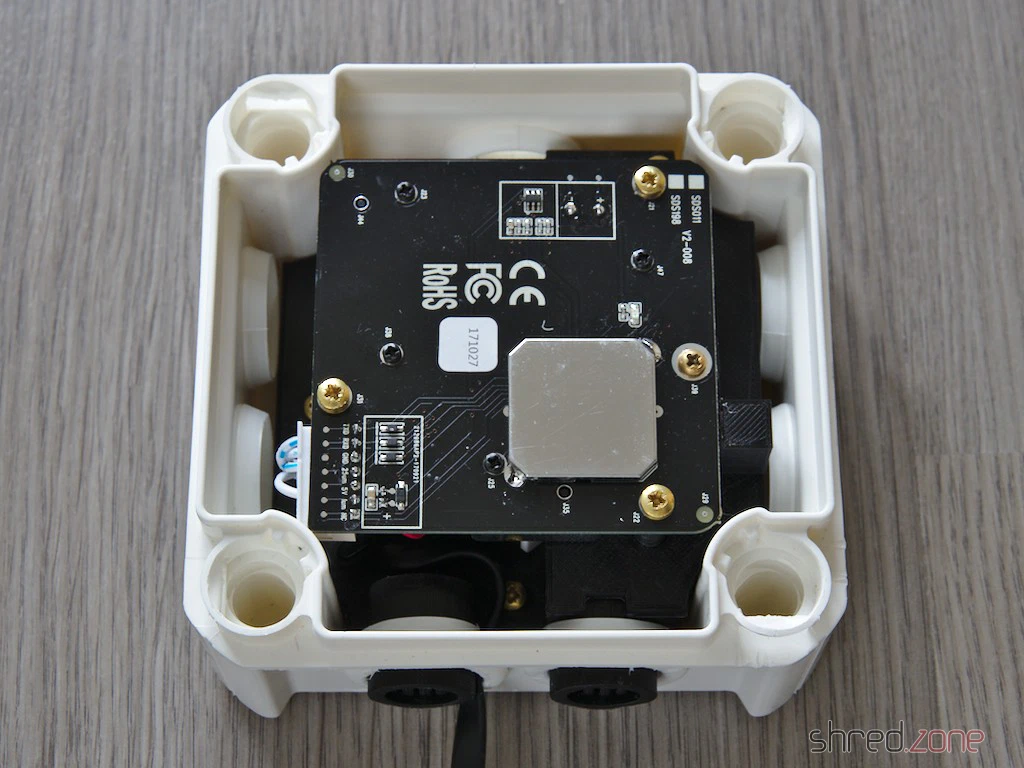
Screw the NodeMCU and the BMP180 onto the base plate and plug the USB cable in. Just slot the DHT22 into its designated spot in the wind tunnel (see photo), it doesn’t need to be screwed down.
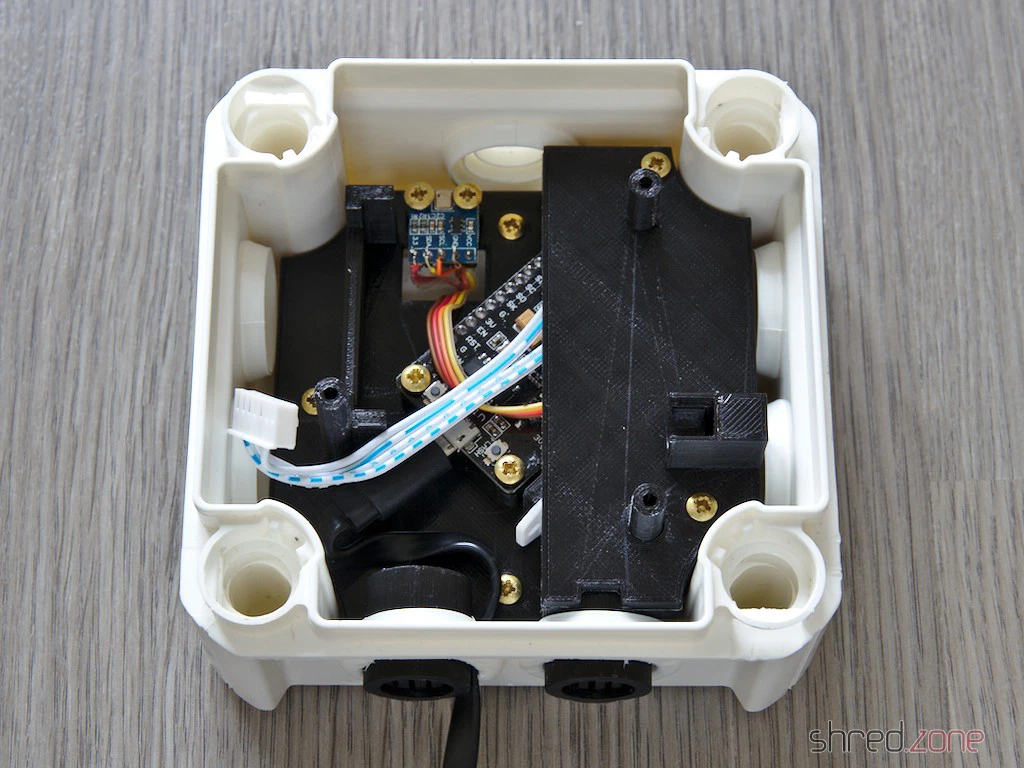
Next, pop the top plate on and screw it down. Connect the fine dust sensor, then carefully slide it into the air vent and screw it in place. You might need to snip a tiny bit off the plug to make it fit.
That’s it. You can pop the junction box lid on and secure it. The sensor is ready to go.

Mount the fully assembled sensor on an outside wall with the openings facing downwards. The casing should easily survive rain, snow, and hail. Since PLA goes soft at 60°C, you should avoid a spot in direct sunlight though. The sensor can also be operated lying flat, but the openings should be protected a bit from the rain then.
The sensor is powered via the USB cable. Since no data is transmitted, the cable can easily be several metres long.
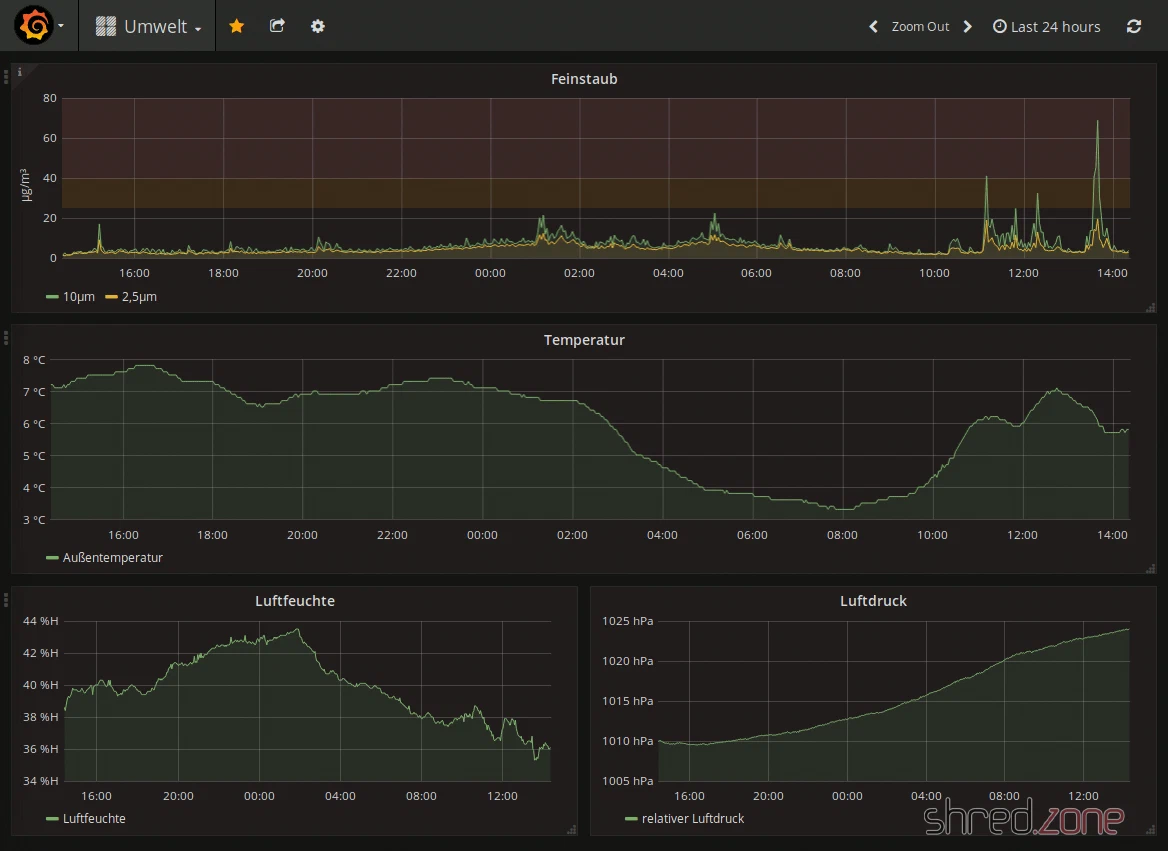
Once you’ve registered your sensor at luftdaten.info, you can see the measurement data on the map and download it as a CSV file. The current measurement data can also be queried directly via Wi-Fi in JSON format and stored in a database, for example. I use a little custom-programmed tool that fetches the data regularly, drops it into a PostgreSQL database, and displays it via Grafana.
Have fun tinkering! 😀