 Note to myself, but maybe you found this article via search engine… 🙂
Symptome: You are trying to post-process a Canon CR3 RAW image file with Darktable, but it doesn’t show any CR3 files.
Reason: Darktable uses LibRaw for reading CR3 files, which in turn uses exiv2. New file formats are not compiled into Fedora’s exiv2 though, presumably for licensing or patent reasons (see this bug report, tl;dr).
Solution: Uninstall Fedora’s Darktable version (either via dnf remove darktable or flatpak uninstall darktable), and install the flathub version via flatpak install darktable.
If you used the dnf version, you can copy the ~/.config/darktable directory to ~/.var/app/org.darktable.Darktable/darktable to keep your Darktable configuration.
 Diaries and private photos, personal emails, bank details and credit card numbers, passwords… Often we are not even aware of what personal and secret information our hard drives have stored. Just take for example the cookie that saves us from having to log into the online shop again, or all the passwords that the browser’s password manager has conveniently saved for us.
Thus, there are always sensational reports about computers or hard drives with highly confidential content being sold second-hand without having been sufficiently wiped beforehand. Another, somewhat more amusing example comes from the buyer of a used notebook which turned out to be defective. Since the seller was not willing to refund the money, the defrauded buyer published out of revenge all sorts of private and delicate details he found on the notebook’s hard drive.
Nevertheless, it can happen that you hand hard drives over to strangers because you want to sell, return, or dispose of them. How do you then securely and reliably wipe all confidential data?
A few important words beforehand!
This article refers to Linux systems and is mainly aimed at private individuals. Not because their data is less worthy of protection, but because the law requires professional and documented data erasure for commercially used hard drives containing personal data.
In this article, I also describe how data is securely and reliably wiped. With just one typo, data that was not supposed to be deleted can be destroyed in seconds. Therefore, you should pay close attention to whether the hard drive device is really the desired one, and rather look at the command one more time before pressing the Enter key. Important data that should not be deleted should always be backed up on a current backup.
In the following text, the hard drive to be wiped is addressed as /dev/sdX as an example. You should check in advance with hdparm -I /dev/sdX whether it is actually the hard drive model to be wiped.
Prevention is better than cure
This old wisdom also applies to sensitive data. It is better not to write it to the hard drive in plain text in the first place, than to have to remove it with effort later. If you store sensitive data encrypted on the hard drive, it is worthless without the key. This not only brings more security when selling a used hard drive, but also protects very effectively against nasty surprises after loss or theft.
Modern computers are fast enough to encrypt the entire system via LUKS without the performance noticeably suffering. Notebooks in particular should therefore always be set up fully encrypted with a secure password, even if that might be annoying when booting up the system.
But encryption is only one aspect. Even encrypted systems should ideally be wiped completely before you hand them over.
How not to do it…
What does not help is simply formatting the hard drive. This only recreates the management structures. “Undelete” programmes or data recovery services can recover a large part of the stored data from a previously formatted hard drive.
A low-level format is also not reliable. Some hard drive models ignore this command completely or do not function properly afterwards.
Commands like srm offer to securely delete individual files. One should also be sceptical of such tools, because there is no guarantee that the file system or the hard drive will not put a spanner in the works.
How do you do it right? For this, you have to distinguish whether it is a mechanical or electronic hard drive. With very old mechanical hard drives, it also gets a little more complex.
Wiping mechanical hard drives
With a classic hard drive, the data is written magnetically onto a rotating disk. Here it is sufficient to overwrite the entire hard drive once with zeroes to wipe all data. If partitions of the hard drive are still mounted, they are first unmounted. After that, the dd command handles the wiping process:
dd if=/dev/zero of=/dev/sdX bs=65536 status=progress
Depending on the age and size of the hard drive, this process takes several hours.
The strings command is suitable for checking whether a hard drive is empty.
strings /dev/sdX
The command outputs all readable character strings found on the hard drive. With a wiped hard drive, nothing of the sort should of course be found.
Wiping SSDs
Modern SSDs work purely electronically and store data in memory cells. Here too, the entire drive can be overwritten with zeroes as described above to wipe it reliably.
Unlike mechanical hard drives, however, the memory cells wear out with every write access. With many modern SSDs, manufacturers therefore resort to a trick to enable a gentle complete wipe. Here, the data is encrypted on the hardware side before it is written to the memory cells. For a complete wipe, it is sufficient to generate a new key. The data is then still present in the memory cells, but can no longer be decrypted even by the manufacturer or data recovery services.
This “Secure Erase” process can be carried out comfortably in the BIOS settings on many systems. It can also be carried out with the hdparm command, however a few things must be noted for this. On kernel.org there is a detailed article that exactly explains the necessary steps.
Wiping old hard drives
With very old hard drives, residual magnetisation can remain after a single overwrite with zeroes, which theoretically can be read out again under laboratory conditions. Here, several wiping passes are necessary, whereby random numbers as well as zeroes should be written to the hard drive, so that as many stored bits as possible change their magnetic state at least once. The US Department of Defence recommends overwriting the hard drive twice with zeroes and once with random numbers. It is even better to overwrite the hard drive seven times, of which random numbers are used at least three times.
The shred command simplifies this task, for example with the following line:
shred -n6 -z /dev/sdX
It overwrites the hard drive six times with random numbers (-n6) and then once more with zeroes (-z). Depending on the size of the hard drive, this can certainly take several days, but at least you can let the command run unobserved until it is finished.
With reasonably modern hard drives with a capacity of more than 100 GB, the data density is already so high that this possibility of restoration belongs in the realm of myths. Even the BSI (Germany’s Federal Office for Information Security) now considers a single overwrite with zeroes to be sufficiently secure.
What to do with defective hard drives?
Defective hard drives are a problem.
If individual sectors are defective, all modern hard drives automatically replace them with spare sectors. The defective sector is then no longer accessible and therefore cannot be wiped either. How many defective sectors the hard drive has replaced can be determined through the S.M.A.R.T. status. If at least one sector is defective, the hard drive should also be physically destroyed after wiping, just to be completely safe.
Completely defective hard drives (for example after a head crash or motor failure) cannot be wiped at all. Here, data recovery services are almost always able to read out large amounts of data. With defective hard drives, you will therefore not be able to avoid destruction in order to irretrievably wipe confidential data.
Destroying hard drives
Commercially used hard drives are best handed over to a certified service provider for destruction, in order to obtain a legally secure receipt that the data was professionally destroyed.
In a private setting, you can also destroy mechanical hard drives yourself by opening them and doing as much damage as possible with tools. It is usually sufficient to deform the magnetic platters. However, caution is advised, because some magnetic platters consist of thin glass and splinter very easily.
ATTENTION: There is a risk of injury from sharp edges and flying splinters! Always wear safety gloves and safety goggles!
With SSD drives, the memory chips must be destroyed, for example by drilling a hole in the middle of the chips with a sufficiently large drill bit.
Like all electronic items, hard drives do not belong in household waste, but must be disposed of via municipal collection points.
The fact that computer generations are becoming increasingly powerful has an interesting side effect: it makes it possible for a modern computer to completely simulate an old computer, including special hardware. This is known as emulating the old computer. The associated software is called an emulator.
This special feature looks at a selection of the emulators available for Fedora.
Source
A few emulators are already available in Fedora Extras or in the Freshrpms repository. However, the real cream of the crop can be found in the rather unknown Dribble repository. With a small adjustment, the new repository is made known to yum:
rpm -ivh http://dribble.org.uk/repo/dribble-release-5-1.noarch.rpm
First of all, you should create an emulator menu in the Gnome taskbar:
yum install dribble-menus
There you will find all the emulators that you have installed from Dribble.
That was just the preparation. Before I introduce the emulators, I would like to mention a small catch to the matter.
Where to get the firmware from?
An emulator basically only provides virtual hardware, which is only half the battle. Every computer needs firmware or an operating system, and this also applies to emulators, which usually require a copy of the original ROM. Here, however, the manufacturer usually still asserts their copyrights, meaning that you cannot simply distribute them together with the emulator.
If you are lucky, the manufacturer has since allowed non-commercial use. In Fedora, the firmware still cannot be included, as the distribution strictly uses only free, open-source software. However, repositories like Dribble offer the firmware where possible. As mentioned, this is legal, as the manufacturer has released the firmware for non-commercial purposes.
If this is not the case, there is really only one legal way: you must own the original device to be emulated yourself. Then you are allowed to read out the firmware or the operating system and use it on the emulator, as long as the original device remains in your possession (and strictly speaking, is not switched on in the meantime). Often, however, there is also the option of purchasing the required files. A certain residual risk then remains, because you do not know if and how stably the emulator will ultimately work with the original files.
A third, somewhat unusual option is that the firmware has been reprogrammed open-source. This is the case, for example, with the Atari ST emulator, which is why it can also be found in Fedora Extras.
You should, however, refrain from using pirated copies. Emulators are viewed with suspicion by many manufacturers and are tolerated rather than liked. If they get the impression that their rights are being infringed by this, the peace could quickly be over.
But enough theory for now! Let’s take a closer look at a few emulators.
Apple Macintosh
The first emulator is already a treat. With SheepShaver you can emulate an Apple Macintosh. MacOS 7.5.2 to 9.0.4 are supported, but not MacOS X. It can be installed from Freshrpms via
yum --enablerepo=freshrpms install SheepShaver
Anyone who still owns a real Mac Classic can now use its operating system for SheepShaver. It might even be possible to install and use the original’s hard drive in the Linux PC. However, there is also the option of downloading and installing the installation files for MacOS 7.5.3 for free from Apple. The question is how much you can still do with it, as MacOS 7.5.3 is already quite dated.
The name SheepShaver is, by the way, a spoof of ShapeShifter, the first software Mac emulator for the Amiga.
Amiga
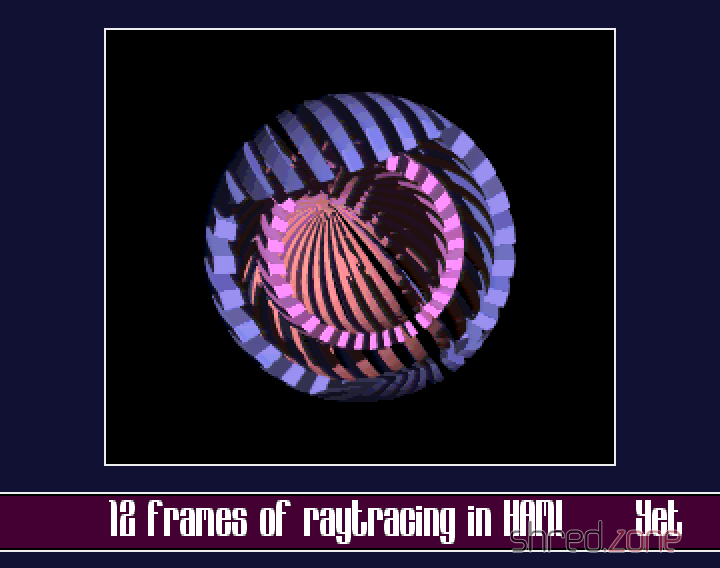 Speaking of Amiga: this classic system can also be emulated. The software for this is called UAE. Originally, the abbreviation stood for “Unusable Amiga Emulator”, and not without reason, because even very fast PCs in the 1990s were not sufficient to emulate just the base model Amiga 500 along with its complex hardware in real time. Meanwhile, however, a lot has changed, so that today even an average PC emulates a faster Amiga than the former top model with a 68060 processor. UAE now also stands for “Ubiquitous Amiga Emulator”.
UAE is installed from the Dribble repository via:
yum install e-uae
Again, the operating system is missing, the so-called Kickstart ROM. Anyone who owns an Amiga can generate a Kickstart file themselves using software from the Aminet. Another option is to get a commercial Amiga emulator that contains the Kickstart file. Mostly, however, you can also find the coveted file on Amiga game collections for the PC, which are available in many software shops. The collections are cheaper and also bring “fodder” for the emulator with them.
Atari ST
Even for the former arch-rival of the Amiga, the Atari ST, there is an emulator. It is called hatari and is even available in the Fedora Extras repository:
yum install hatari
The open-source EmuTOS is used as the operating system here. This makes hatari truly 100% Open Source.
Commodore C64 and its siblings
A whole army of emulators is brought by vice, from the C64 and C128 up to very old treasures like the Commodore PET. Vice is installed from the Dribble repository via:
yum install vice
Unfortunately, there seems to be a problem with the sound; at least I always get an error message that alsa cannot be accessed. This is tragic, especially with the C64 and its legendary SID synthesiser chip.
ZX Spectrum
Even though the C64 was undoubtedly the most popular home computer of the 1980s, there were alternatives. One was the Sinclair ZX Spectrum. Of course, there is also an emulator for this, called FUSE (Free Unix Spectrum Emulator). The emulator itself is in the Extras repository, but without the necessary ROM files. These can be installed additionally from the Dribble repository. The following line installs the complete emulator with ROMs and various tools:
yum install fuse-emulator fuse-emulator-roms fuse-emulator-utils
Various models such as the ZX Spectrum 48k, the ZX Spectrum 128k, or the identically constructed devices from Timex and Pentagon are emulated.
MAME
A true specialist among emulators is MAME, the Multiple Arcade Machine Emulator. The purpose of this software is to emulate arcade computers. Not exactly an easy task, because very often the hardware of the device was tailor-made for the game.
The emulator is in the Freshrpms repository and is installed as follows:
yum --enablerepo=freshrpms install gxmame xmame xmame-roms
To be able to play with MAME, you need the ROMs of the original systems. These are quite difficult to obtain legally, because actually you have to own the system (or at least its ROM chips) to do so. At least three games, whose ROMs were released by the owners, are installed along with the xmame-roms package.
Other Emulators
Dribble offers a multitude of other emulators, for example for Gameboy, Gamecube, NES, Nintendo 64, or for MSX home computers. Have fun trying them out!